Table of Contents
Having the right tools is key to making any job easy, but that’s not all. When it comes to cleaning in tight spots around car seats, knowing how to do the job is just as important.
This article will be covering how to clean tight spots around your seats without removing them. While removing the seats will make the cleaning job much easier, there are downsides to pulling out seats as well.
Let’s check out the details of cleaning tight spots around car seats.
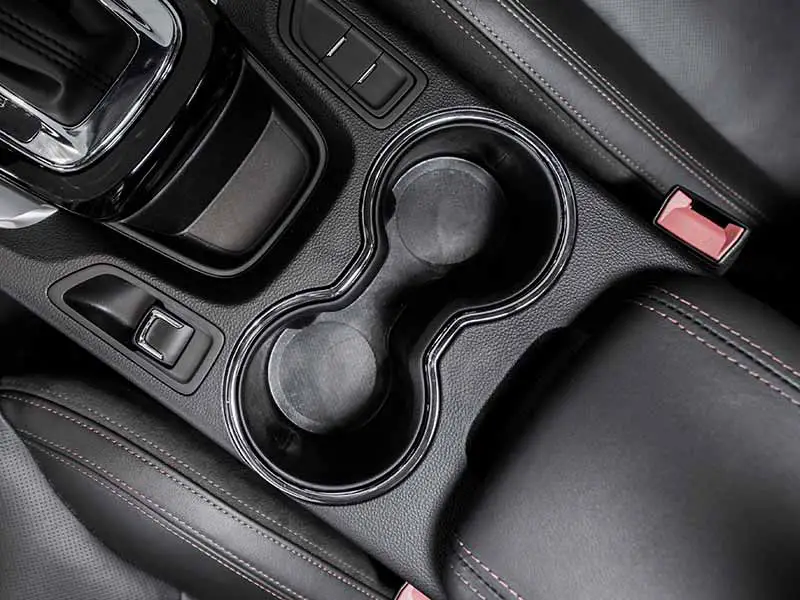
How To Clean Between Car Seats And Center Console
- Step 1: Remove The Floor Mats
- Step 2: Clean Away Easily Remove Trash And Debris
- Step 3: Move Seats Backward As Far As Possible
- Step 4: Vacuum The Front Car Seat Footwells
- Step 5: Use Your Detail Brush On Tight Spots
- Step 6: Move Seats Forward As Far As Possible
- Step 7: Vacuum The Rear Car Seat Footwells
- Step 8: Finish With Your Detailing Brush And Crevice Tool
Tools Needed
Let’s cover the tools you’ll want to have on hand to make the job as quick and easy as possible:
Powerful Vacuum Cleaner
Suction is key to making short work of any vacuuming job. A powerful vacuum cleaner can pull out dirt underneath your car seats much more quickly and efficiently. Poor suction power can make the job a nightmare.
A vacuum with 5hp or more peak power is what you want here. You also want something small so it’s very portable. The VacMaster Beast fits both of these requirements exceptionally well.
 1")
Crevice Tool For Cleaning Car Seats
It’s important to have a good quality crevice tool and flexible quality hose for your vacuum cleaner. Mr. Nozzle makes some of the best upgrade hoses and nozzles you can find anywhere.
Be sure to keep a little sandpaper handy to keep the nozzle free of burrs and roughness that could cause scratches on plastic trim and catch on carpet and upholstery.
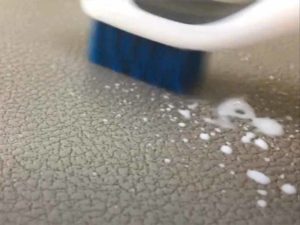
Stiff Bristle Interior Detailing Brush
A narrow toothbrush style detailing brush is excellent for getting into crevices and tight spots. It’s excellent for for fitting between your seat and center console.
A narrow stiff bristle brush can pull dirt, crumbs, and other bits up and out of carpet in hard to reach areas of your car seats. Once the dirt and debris is agitated it can be easily vacuumed up.
It’s also gentle enough to clean textured plastic around your console to remove sticky bits and stubborn dirt in the hard to reach areas between your seat and center console.
Chemical Guys has a great narrow stiff bristle brush that has two different width heads for extra versatility.
Rubber Pet Hair Brush
Pet hair gets trapped between the fibers of your carpet under car seats and a vacuum can’t remove it efficiently. A rubber pet hair brush is great for pulling hair out of car carpet and making it easy to grab or vacuum out of tight spaces you can’t reach as easily with your hands.
The rubber bristle brush is grippy and grabs the strands of hair and pulls them out of the carpet fibers. This makes a nearly impossible job a lot easier.
Chemical Guys makes a great cheap rubber pet hair brush that works great. Well worth a few bucks for the time and effort it will save you and excellent results it produces
Microfiber Cloth
Microfiber is an essential tool in any detailers arsenal. The microscopic fibers grab dust particles and surface dirt and trap it where it deep in the nap of the cloth so it won’t cause scratches on smooth plastics and other easily scratched surfaces.
I’m a fan of microfiber cloth from The Rag Company. They have a large assortment of short and long nap microfiber products to fit whatever specific need you have and all are very inexpensive.
Optional: Air Compressor
Air compressors are handy tools for some unique detailing tasks. In this instance, compressed air can blow loose dirt out of crevices, from around and in nooks of car seat rails, and can even clean car seat folds.
An air compressor is very much a nice-to-have tool but it can be very handy for blasting out difficult to reach spots between your seat and center console as well as around car seat rails.
How To Clean Under And Between Car Seats: Step-By-Step Instructions
The following is my recommended cleaning process for how to clean between car seats thoroughly without removing the car seats themselves.
I only recommend removing car seats if you have someone to help you and you know how to remove the seats without detonating the airbags.
Step 1: Remove Floor Mats
Remove the front and rear floor mats from your car.
Carpeted Floor Mats
Away from your car, beat each mat thoroughly to knock all the dirt out of the carpet fibers. Depending on how clean they are, you may need to use a rubber pet hair brush to pull hair out of the carpet as well.
Thoroughly vacuum the mats to remove any remaining dirt, crumbs, etc.
Rubber Floor Mats
Away from your car, beat each mat thoroughly to knock all the loose dirt and debris. Wipe the mats down with a wet microfiber cloth to remove the remaining dirt and dust.
Step 2: Clean Away Easily Removed Trash And Debris
Clean up all of the larger bits of trash, coins, and random French fries from floor board area around and under the front car seats and center console. Move to the rear of your car and clean the back seats and rear floor carpets as well.
Step 3: Move Seats Backward As Far As Possible
With your front seats moved as far back as possible, make any other adjustments you can to gain more space to work. If you have more movable seats and can raise them up or tilt them, move them as much as you can to make it easier to access underneath the front seats.
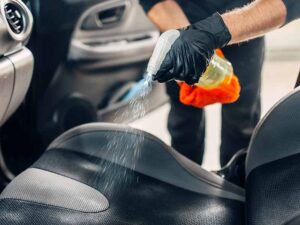
Step 4: Vacuum The Front Car Seat Footwells
Vacuum the majority of the now reachable areas as thoroughly as you can. Using your vacuum’s crevice tool, vacuum tight spots under the front seats carefully. Try to avoid scratching plastic trim on the console base and any easily scratched trim that may be on the car seat tracks.
If you have hair trapped in the carpet fibers, use a pet hair brush to pull the hair up and out of the carpet and pile it into a spot to vacuum up later.
Step 5: Use Your Detail Brush On Tight Spots
Using a stiff bristle brush, brush as much hidden dust, dirt, and crumbs forward from around seat track rails. Also use the brush to clean between car seats and center console.
Your detailing brush can be used to loosen stubborn dirt stuck to trim pieces and embedded in the carpet fibers. Try to move all the dirt toward an easier to reach spot to be vacuumed up.
Not all the dirt will be easily moved to an easier to reach location. You’ll need to use your vacuum’s crevice tool to vacuum tight spots that you’ve managed to loosen any dirt that you weren’t able to vacuum away earlier.
Step 6: Move Seats Forward As Far As Possible
Now we’re going to repeat the process for the back seats footwell area. You’ll move your seats forward as far as possible and raise and tilt them as much as you can to give you the most room to work under the seats.
Step 7: Vacuum The Rear Car Seat Footwells
Like before, vacuum as much dust, dirt, and crumbs away from around the car seat tracks and center console with the vacuum’s crevice tool.
If your crevice tool is roughed up around the inlet you should consider sanding it smooth to help protect the plastic trim and panels from getting scratched and scuffed.
Step 8: Finish With Your Detailing Brush And Crevice Tool
Use your detailing brush to reach any tight spots around the bottom of the car seats and seat rails that you couldn’t reach with the crevice tool before.
If it helps, keep your vacuum on and position the inlet of the crevice tool as close to the dirty area as possible. Brush the dirt, dust, and crumbs toward the vacuum hose inlet.
Why You Shouldn't Take Seats Out Of A Car
Removing seats from your car or truck to thoroughly clean underneath them and around your center console will definitely make it much easier to clean the area. But there are some downsides and important things to know before you do so.
Potential Damage
Car seats are large and heavy. Unless you have someone available to help you maneuver the car seats out of the car, you probably don’t want to try to remove them. Removing car seats alone can easily cause accidental damage to parts of the car interior such as door panels, trim around the door opening, dashboard, and steering wheel.
Electrical Connections
Many modern cars these days have powered seats. More often, the driver’s seat is powered, although the passenger seat may not be. Powered seats will have electrical harnesses that need to be disconnected before attempting to pull out the seats.
Air Bags
It’s also common for front car seats to contain air bags in the side of the seat backs. If this is the case, you will need to follow the recommended process for removing the seats to avoid detonating the airbag. This is usually simply disconnecting the car’s battery prior to attempting to disconnect the electrical harnesses.
Helpful Links
Conclusion: How To Clean Between Car Seats
Deeper cleaning of your car’s interior means properly cleaning between the console and seats. Seat removal may seem like the most efficient way to clean between car seats and the console, but you can damage the car’s interior if you’re not careful and don’t have someone to help you.
A crevice tool and some detailing brushes can easily get the job done if you have a powerful vacuum and a little patience.
I actually find this much easier than pulling car seats out unless there is a nasty drink spill or something else significant that would make pulling the seats worthwhile.
Good luck and happy detailing.