Table of Contents
Have you ever had a parallel parking mishap? What about getting too close to the curb, taking a corner a little too fast? It happens, and I have the DIY repair solutions for just about any rim type, that will give you the same quality as a professional.
How much does it cost to fix curb rash?
The price for a professional garage or body shop to fix curb rash and repair wheel damage can be anywhere between $125 to $500 to restore the rim to its original state. All for just bumping a curb.
You can, however, save money with a quick DIY and maybe get even better results.
Is it worth repairing curb rash?
It’s important to realize that in some situations, there is only so much that you can do to repair rims. If you have scratches, scrapes, or small dents, you’ll save yourself a lot of money doing this DIY! However, if your rim is bent or if flat-spotting has occurred–this is too much damage, and your best bet would be to take it in to get a wheel replacement.
Curb rash repair prep
Microfiber Cloth
For every car project, a good microfiber cloth, such as those from The Rag Company, is an important item to have within close reach. A microfiber cloth has the ability to deliver a scratch-free finish for your wheels and is more durable than a traditional shop towel.
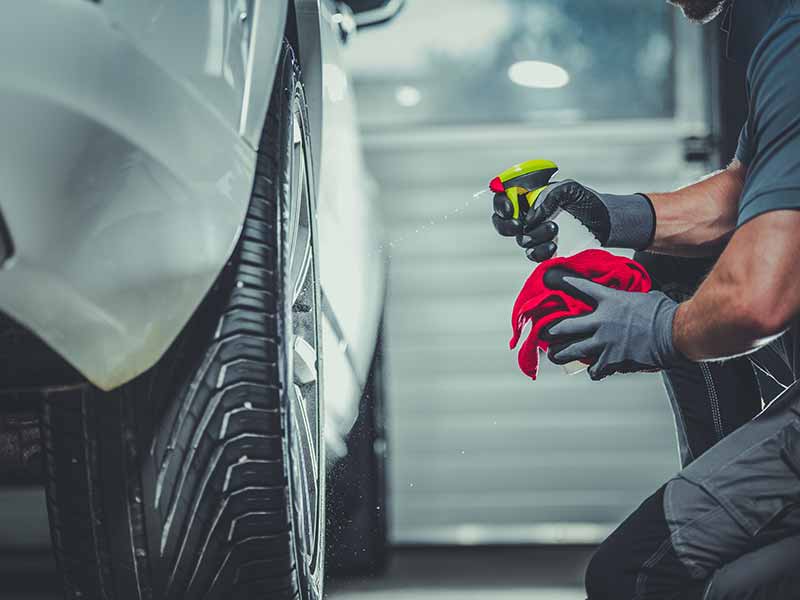
Wheel Cleaner
Before beginning the rims repair, you will need to make sure you have a clean wheel surface. By using Sonax Wheel Cleaner Plus, you will get rid of all the gunk and residue left behind such as caked-on brake fluid, road debris, and dirt. This product is also safe on all wheel types and all types of wheel metal.
Repairing Aluminum Alloy and Black Rims
1. Clean and Prepare the Area
This is a very important step in any work that you are doing on a car, especially as you go to repair alloy wheels. If you don’t remove any leftover wax or polish from previous cleanings, you risk the chance of your work not turning out the way you planned.
You should mask around the damaged area, and make absolutely certain you also get under the tire rim, in order to avoid painting on the tire.
Put a paper covering or a sheet over the vehicle, the tire, and the untouched alloy wheel area, to avoid getting other areas covered in unwanted paint. While you’re fixing one problem, you don’t want to cause another, especially one with more damage.
2. Sand and Putty
Once the area is clean, you need to sand the area down with 240 grit sandpaper. This will finely smooth out the scratches. You need to sand down ¼ of an inch past the scratches in order to get the feathering effect that you will be looking for when painting.
Apply a filler putty (like Bondo) to the scratched area and use a 600 grit sandpaper to shape the putty to the rim. This will give you a smooth surface to begin your painting.
3. Clean Again
After you sand the putty down, you need to clean the area again. This extra bit of cleaning will prevent any amount of dirt or impurities to ruin the paint that you are about to apply.
4. Begin Painting!
For the best results, you should use a thin coat of metal alloy primer and let it dry for one hour before painting.
Spray a thin coat of paint directly on the rim in one sweeping motion, wait an hour for it to dry, and then wet sand the area using 1200 grit sandpaper. Repeat two to three times for ultimate coverage, continuing to allow an hour between each coat.
Now you can apply your clear coat using the same method as you did with your paint. Allow 24 hours before touching the masking tape. Wet sand the clear coat in order to blend the old paint into the new.
 1")
Repairing Chrome Rims
1. Prepare the Surface
Sand the Area using 220 grit sandpaper. The area needs to be smoothed until no pits or major damage is seen, but scuff marks are okay to still be seen at this time.
2. Wet Sand
Use the wet sanding method to further smooth out the damaged chrome. Go from 400 grit to 800 grit, and then lastly, use 1200 grit. This prevents rough buildup from further scratching the chrome that you are trying to preserve.
3. Clean
Clean the area that you just sanded. This will allow the paint to apply evenly.
4. Block off the Area
You should mask around the damaged area and protect the undamaged portion of the rim with paper. Ensure you block off under the rim to avoid painting the tire.
5. Paint
Apply a chrome spray paint that is designed for chrome rims. Apply 3 coats of paint to the area, allowing time for drying in between each coat. Allow the final product to dry for 8 hours.
6. Finish
Use a microfiber cloth and a chrome polish to polish the entire rim. This will allow the newly painted area to mesh seamlessly with the old paint.
Repairing Machined Rims
1. Prepare and Shape
Take some tape and mask off the area of the rim that you will be working on. Use a flat file to reshape the contour around the lip and shape the cross contours that make up the unique designs of the machined rims. This area is typically where we repair rim damage from road rash. Mimic the motion that follows the direction of the machine finish.
2. Remove the File Marks
Once the scratches are removed, you will need to address the file marks. This can be addressed by wrapping 400 grit sandpaper around a popsicle stick and wet sanding the area.
3. Match the finish
Start with a 600 grit sandpaper and then swap over to an 800 grit. This will brighten the area and get closer to the original finish before the rash damage to the wheel rim. If your fixed rim still needs to be brighter in color, continue moving up into higher grits of sandpaper until you get the wheel rim to look its best.
4. Finish
Once you are satisfied with your finish color, clean the area with a microfiber cloth, and apply touch up clear coat over the newly repaired curb rash area.
Repairing Polished Wheels
A helpful product for this repair is a dual-action sander and polisher like this one by Porter-Cable. This sander will allow bur-like scuffs to be sanded down on the wheel with ease, allowing a smooth surface to continue the repair on.
1. Grind Down Rough Edges
Use the lowest setting on a power sander to smooth out all the scuffed bur sections and round it out to look like the original rim shape, make sure to take your time in order to avoid removing too much metal.
2. Clean the Area
Remove any large debris from sanding in order to adequately gauge what you need in terms of finer details for the overall wheel repair.
3. Fine Detailing
Start with 400 grit sandpaper and smooth out the remainder of the rough spots on the rim. Finish off the wheel detailing with a 1500 and 2000 grit sandpaper.
4. Polish
Use a dual-action polisher and an aluminum polish to put the shine back into your rims!
Helpful Links
Conclusion
Curb rash can happen to the best of us. If it happens to you, and you seemingly wreck your new wheels, don’t panic. With these simple DIY techniques, you will be able to restore your rims and overall wheels to look close to pristine condition.