Table of Contents
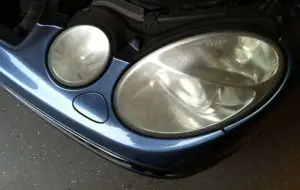
Trapped moisture in the headlight assembly can result in dangerous nighttime driving. Whether you have condensation in headlight areas, fogging headlights, or just a cloudy headlight unit, it will result in your headlights being dim and reduces the overall visibility. This doesn’t have to be a death sentence to your headlights, by a few quick DIY remedies, most of which you won’t have to remove the headlight assembly, your headlight will be back to looking new in no time.
What causes moisture in a headlight
A fogged headlight can be caused by a number of things, but below are two of the most common. Diagnosing what could be wrong with your headlight unit could come with some trial and error, but by knowing what you’re up against, you could speed the process right along.
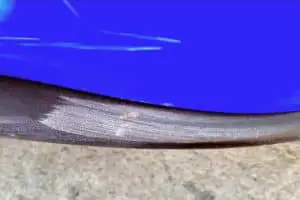
A Cracked or Torn Seal
This will allow water to get inside the head light that will increase the condensation surrounding the headlight assembly. Sometimes this can be hard to see, especially if it is a problem with the seal. There are ways that you can test this and make sure this is the issue, some are even as simple as running your vehicle through the wash and checking the water level in the headlight and on the lens after. If your seal is having any issues, it will continually let water get inside from the exterior back into the headlights and dim your lights or create blind spots while driving at night. This can make driving quite dangerous and definitely something that you should be sure to stay on top of.
A Blocked Headlight Vent
Your headlights need ventilation because as you drive around, your head light housing heats up and cool air needs to flow into the head light in order to cool down the heat of the fixture. Your headlights use vents in order to expel this hot air back out of the surrounding area and take back in the cool air from the outside of the vehicle. Once the head light loses that ventilation, the condensation will gather in the headlights and restrict the amount of usable light from the lends for night driving. The head light vent can get blocked from spider webs, dust, road debris, or maybe even a mixture of all three. You will need to remove all of these in order to be sure your vehicle can use the ventilation system to get rid of moisture.
Will headlight condensation go away?
Headlight condensation may not last forever and doesn’t necessarily mean your headlights need replacing.
Minor levels of moisture on the lens will go away after running your car for a few minutes, as the moisture could have to do with the air outside being cooler than the temperature on the lends or vice versa with the lens being cooler than the air outside of the headlight.
This can be solved by running your car for a few minutes before taking it out on a drive, so that the temperatures can be equalized out, allowing the moisture to evaporate out of the headlight.
Another common remedy is if you notice the lens fogging and an increase of moisture inside your headlight, use a natural method! Let your car sit in the sun for a half-hour or so, this will heat up the headlights initiating the same moisture evaporation technique inside the area as running your car would for a few minutes.
How do I get the moisture out of my headlights?
How severe is the moisture in your headlights? The level of moisture that you have in your headlights will affect which method will be the best for you to use to remove the water:
Minor to Moderate Moisture
Silica Gel Packets
If you have minor to moderate amounts of condensation around your headlight lens, then the simple placement of a silica gel packet inside the headlight housing can make a great improvement. The silica gel readily absorbs water and can do so for a lengthy amount of time, which will ultimately prevent the buildup of water in the headlight. This is a good technique to use if your vehicle typically is housed in a garage.
Hair Dryer
If you have a minor to moderate amount of moisture that is just sitting in your headlight, a good thing to try would be to get the family hair dryer. A hair dryer puts out just enough heat to get rid of some of the water out of the headlight and to jump-start the evaporation process that will allow for the rest of the water’s removal. You’ll need to let the heat from the hair dryer blow into the vent for this trick to work.
Moderate to Heavy Moisture
Pressurized Air
If the condensation in your car is moderate to heavy, you could have a blocked headlight vent. A blocked headlight vent will prevent the moisture from being able to leave the headlight when it heats up allowing moisture to bead against the headlight lens. This is a relatively easy fix in which you just need some pressurized air to spray in the vents. A can of pressurized air will work or if you have something such as the Metro Vacuum B3-CD Air Force Blaster in your arsenal it will work even better. I love this tool because it blasts the area with warm, filtered air that can not only dry the surface with the heat, but clear away any spider webs, dust, or road debris.
Heavy Moisture
Taking off the headlight
If you have significant amounts of moisture around your headlight lens, it may be impossible to remove the moisture without taking off or opening the headlight. You may have something more that is underlying the accumulated moisture that you may have to address, such as– a seal problem that you would benefit from taking off the headlight and will end up saving a lot of time that way. When you have to take off a headlight, you will have to use tools such as microfiber towels by The Rag Company and a good sealant to seal the headlight area again in a more effective manner to eliminate any chance of fog in headlight housings.
How do I get the moisture out of my tail light?
Your tail lights are quite useful to drivers that follow behind you at night and can help you avoid some very costly wrecks. Once condensation starts to bead up in your tail light, it will lead to your lights not working as well or even prematurely burning out the light in your taillight lens.
Having to remove moisture out of a tail light can be done by the same approach that the headlight was remedied. The only thing you really need to consider is that it may be hard for you to tell when the tail light starts to go out as it doesn’t affect your vision at all. It is important that you make sure to check your tail lights as you perform routine maintenance on your vehicle in order to potentially prevent more costly damages.
Helpful Links
Conclusion
Having your headlights fog or your tail light go out from condensation can be absolutely frustrating, but by taking some of these easy DIY solutions into consideration, you will be able to fix this dangerous and equally as annoying problem, stress-free.