Table of Contents
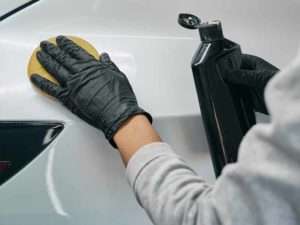
Removing swirl marks by hand instead of using orbital polisher is definitely doable and not necessarily a bad way to go.
Using polishes by hand means you’re going to work harder physically and the process will take longer but you’ll gain more control.
If you’re concerned about ruining your paint with an orbital polisher you’re not alone.
This is probably the main reason that people want to attempt to remove swirls and scratches by hand.
Also, if this is something you won’t be doing often then paying for a decent orbital polisher may not be worth it.
How To Remove Swirl Marks By Hand
- Prep the surface by thoroughly washing the vehicle
- Decontaminate the surface with a clay bar
- Using a light, inspect the surface to identify fine swirls and scratches
- Use polish and a proper polishing pad designed for hand polishing to polish away identified swirls
- Reinspect and repeat as necessary
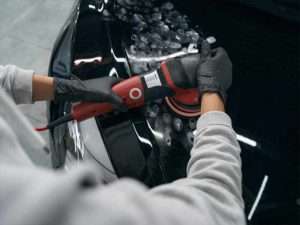
If you’re concerned about damaging your paint with a polisher you can definitely muck things up but you can easily learn to use a polisher if you’re inclined to give it a try. Your arms will thank you.
No? Still want to do the job by hand? Understood. The process for polishing out swirls and scratches is the same whether you’re using a polisher or good old fashioned elbow grease.
Continue reading to learn the basics for getting rid of those blemishes and get your vehicle glassy smooth.
Preparing the paint surface
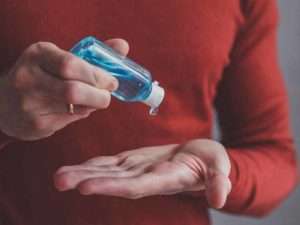
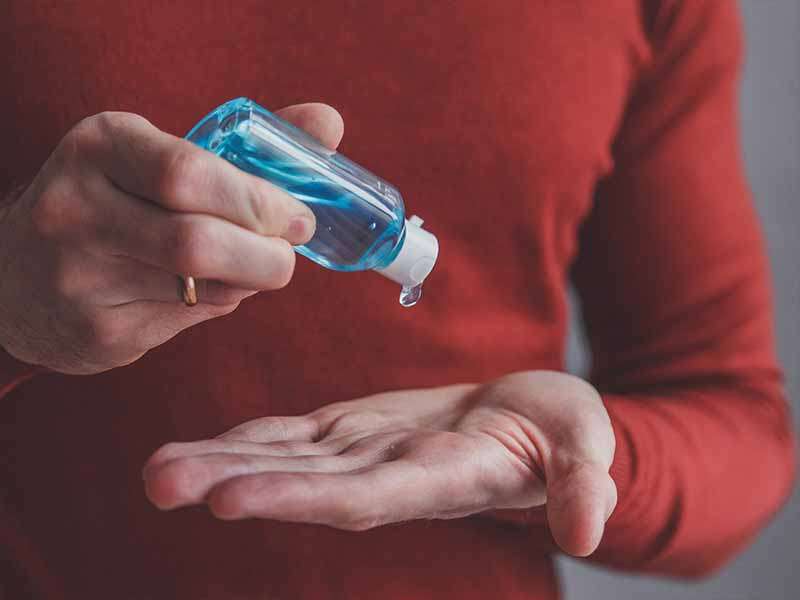
Before you begin you’ll need to ensure your car is thoroughly cleaned. Wash it appropriately to ensure you don’t create any swirls or scratches in the paint.
To do so you can use the touchless or 2 bucket method to wash your car or truck.
Once the car has been cleaned well and dried, you’ll need to clay bar your vehicle to get as much of the remaining grit and grime off that just washing won’t remove.
This grit needs to be removed or you’ll likely end up grinding it into your paint and causing more damage prior to the polish being able to adequately remove the scratches.
Ideally you’ll be working in a shaded area for this entire process.
This may not be possible for you. If that’s the case you may need to rinse frequently when washing or work in smaller areas when using clay.
You may want to wash your car once more after claying but usually wiping off the clay bar lubricant is sufficient.
Once all of this is complete you should have a very pristine surface to begin the process of polishing out scratches.
Polishes

Chemical Guys
Polishes
Inspection Light

Adam's Swirl Finder Flashlight
Polishing Pads

Chemical Guys Hand Pad Kit
Polishes
Inspection Light
Polishing Pads
Chemical Guys
Polishes
Adam's Swirl Finder Flashlight
Chemical Guys Hand Pad Kit
Inspecting the paint surface
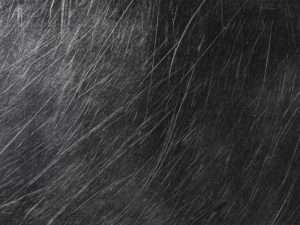
If you weren’t able to find a nice shady spot to work then you’ll likely have no trouble identifying swirls and scratches in the bright sunlight.
If you’re working in a shaded area you’ll want to have a bright flashlight to use. A super bright led flashlight is ideal in this scenario. There are lights specifically designed for inspecting paint available but they aren’t strictly necessary.
You can shine the light on the paint and easily see swirls and scratches. We can’t correct deep scratches but we can fix light damage. You’ll want to go over the car and identify all of the problem areas.
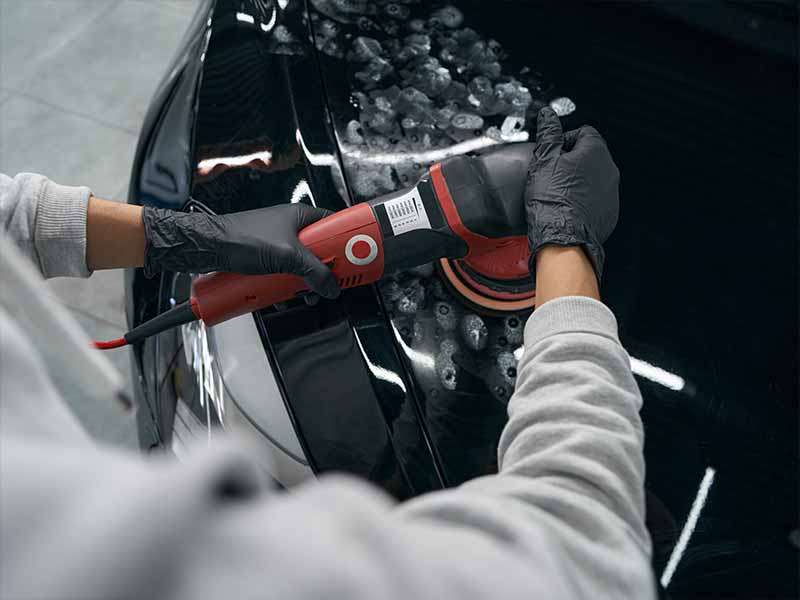
Polishing out swirls and scratches
Manufacturers of polishes that are used for removing swirls and scratches typically make a few different levels of aggressiveness. More abrasive compounds are for more severe scratches while mild polishes are obviously for very light swirls and scratches. They usually also include a finishing compound which is designed as a final polish to restore the gloss after compounding out the defects as much as possible.
Manufacturers also produce polishing pads that aid in the aggressiveness and effectiveness of the compound. You’ll want to have a few different types on hand and experiment with them to get a feel for what works best with different compounds and for removing differing depths of scratches.
Different manufacturers will have different arrays of polishes and pads available for you to choose from. Essentially they will be the same in their offerings.
What you’ll need to hand polish your car or truck:
Since you’re giving this a shot for the first time most likely you’ll want to start small and get a good feel for how the process works. Choose a small area you’d like to work on first.
Since you don’t yet have a good feel for how aggressive of a polishing compound you’ll need, the best thing to do is start out with the mildest cutting compound and see how well it works on the section your using for practice.
Once you begin to get a feel for how aggressive a compound is and how difficult to resolve different scratches are you can more easily jump directly to the most effective cutting compound.
Remember that you’re removing clear coat to remove the scratches so it’s worth using the mildest cutting compound necessary to get the job done.
Once you’re satisfied with the results you’ll want to go back over the spot with a finishing polish to help restore the same level of gloss as the unpolished sections.
Finishing compounds don’t have much ability to remove scratches and don’t do much paint removal. It is strictly for restoring gloss and shine.
Aggressive cutting compounds will pull out scratches but will often leave the finish slightly more dull.
Now that you have the process sorted out you can continue with the remainder of the car.
Protecting your hard work
Once you’ve finished compounding the entire car you’ll definitely need to apply a good protective coating. Either a wax, sealant, or ceramic coating.
Waxes are best for show cars and weekend cars since they have such a short lifespan.
Sealants are great for daily drivers since they often can hold up for 5 or 6 months.
Ceramic coatings are a little more challenging to apply but consumer grade coatings you apply yourself can last up to 2 years.
Professional detailers have access to ceramic coatings that are said to last up to 10 years! We highly recommend going with a quality sealant such as Wolfgang Deep Gloss Paint Sealant. Sealants are generally easy to apply and hold up extremely well.
If you’re interested in a ceramic coating we recommend the fairly easy to apply CQuartz UK 3.0.
Helpful Links
Conclusion
Polishing out swirls and scratches
can definitely done by hand and is great for a few problem areas. If you’re dealing with an entire car however prepare for a long day or days and some sore arms and back.The proper tools will help make the job easier though. Having a range of polishing compounds and a range of polishing pads will help give you more control and make the job easier.
Polishing is just one step in the process however. The car will obviously need to be thoroughly cleaned first. Then when the surface has paint has been completely corrected you’ll need to apply a proper protectant.
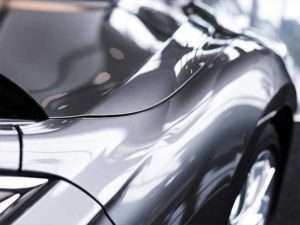
When all is said and done you should end up with a significantly improved finish, free of the majority of swirls and scratches it previously had. You likely won’t be able to resolve every single blemish but the vast majority should be polished away.