Table of Contents
In the world of detailing, there are so many products to consider. As you look at different options, you’ll be introduced to a number of sealants and waxes to choose between. What’s the difference between a sealant and wax, how do they work, and which one is right for your car?
We’ll be exploring these questions and more in this ultimate guide of sealant vs wax. By the end of this piece, you should know exactly which product is right for you and how to apply it.
Sealant Vs Wax
Synthetic paint sealants provide a more durable layer of protection than natural carnauba waxes.
Sealants can last over a year while waxes typically only last a couple of months.
Introduction to Sealants
Let’s start by introducing paint sealants. This product is less popular than waxes in residential garages, but it serves a valuable purpose.
What Is a Sealant?
A sealant is an engineered solution that offers lasting protection and durability. The purpose is to protect your paint from environmental impacts as you drive around.
A sealant will add heat resistance, UV protection, and will add a layer of protection. It’s not necessarily used to make a car shinier; it’s designed to make a car more rugged.
People will typically use a paint sealant on their daily driver to keep the paint in mint condition for longer.
Types of Sealants
When selecting sealants, you’ll notice a few different choices. In general, the two biggest options are acrylic and polymer-based sealants.
You can also find synthetic polymers, polymer protectants, abrasive (multi-use) sealants, ceramic coating sprays, and binding monomers.
We suggest using a polymer sealant for DIYers. It’s simpler to use and more forgiving.

Introduction to Waxes
Next, let’s talk about waxes. You’re probably more familiar with car waxes, and you might have already waxed your cars in the past.
What Is Wax?
A wax is typically a natural product that aims to add a level of shininess to your car. A wax adds a layer of film on top of your car’s topcoat. This film will enhance the color of your car and add a great sheen to your vehicle.
It’s a common practice for most DIYers to wash then wax their cars.
Types of Waxes
Most of the high-quality waxes use carnauba oils, which is a natural option. Other types of waxes are beeswax, synthetic, and all-purpose (wash and wax). You can find liquid, paste, and spray-on waxes.
Typically, we recommend using a natural liquid wax, since it offers a nice blend of quality, finish, and cost-effectiveness.
The Typical User for Sealants and Waxes
As you’ll see shortly, waxes are a pretty universal product. Plenty of car owners will use a wax on their daily driver pretty routinely.
Sealants are a little more niche. They still benefit the average driver, but many car owners will skip the step of sealing their car.
The typical user is anyone who owns a car. Detailers will use both products pretty heavily, but the everyday consumer can as well.
Differences Between Sealant and Wax
In order to pick the right option for your car, we should dive into some of the major differences between these two options.
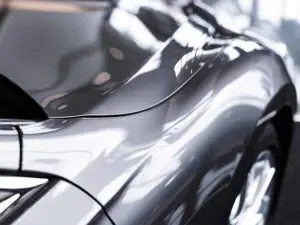
Aesthetics
A wax will make your car look a lot nicer afterwards. A sealant won’t add the same shine. A freshly-waxed car will look showroom ready, while a freshly-sealed car will just look clean.
How Long They Last
Natural waxes are very susceptible to direct sunlight and heat. Drivers in Arizona will have to wax their car much more often than drivers in Maine. Sealants, on the other hand, don’t wear down as quickly.
You can easily go 12 months with a single application of sealant, while you might need to re-wax your car every month or so.
Its Effect on Paint
Another big difference between these two products is how they affect your car’s paint. A sealant creates a protective layer over your topcoat which locks everything in.
A wax doesn’t offer the same. Again, waxes are mostly used to improve the shine of your topcoat. A layer of wax will be present over your topcoat, but it won’t offer the same level of protection.
The Application Process
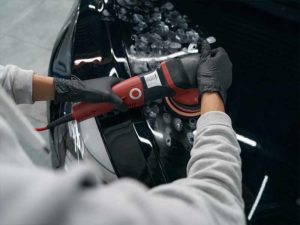
We’ll discuss this idea more in-depth later. The application process is very different between sealants and waxes. A wax requires specialized equipment and some extra experience.
With a sealant, you can complete the application process with a simple towel and nothing else.
Popularity
For a consumer-grade DIYer, wax is far more popular than sealant. In fact, a lot of car owners might not be familiar with sealants at all, and they might be waxing their car regularly.
Due to this reason, there are more waxes on the market. You’ll find more options that meet different criteria and target a wider range of price points as compared to sealants.
Ease of Use
Due to the more rigorous work you need to do before application, sealants are a little more difficult to use. It entails owning a clay bar and having familiarity with the product (which many consumers don’t). Waxes, on the other hand, are much easier to use.
Waxes can even be applied by hand without a machine, though the results won’t be as good.
If you strictly compare just the application process, sealants are a little easier to use. Waxes require more time to apply and typically require using a dual-action polisher to get the best final product. A sealant only requires a towel and the product to apply to a fully decontaminated car.
However, it’s worth mentioning that neither of these products are especially hard to use. They require very little expertise or tooling.
Overall Price
Looking strictly at the products, the prices can vary a lot. Depending on the quality and size of the container, you can find paint sealants that range from $10 all the way up to $100. For residential users, that range tends to stay between $10 and $30.
Waxes will follow the same pattern. Some of the smaller containers of paste waxes can be less expensive than that. The downside is that you’ll typically need to buy an orbital polisher and pads in order to correctly apply the wax. This adds to the overall price a lot, but it’s a one-time purchase that can be used in a number of different applications.
How to Apply a Paint Sealant
To better understand these two options, we’ll walk you through the application process. Up first is a paint sealant. Follow along if you want the best results.
Step 1: Decontaminate Your Car
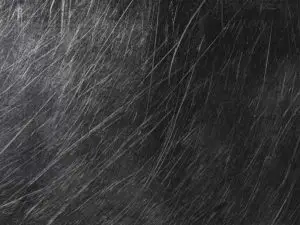
You need to start with a fully decontaminated car. This goes above and beyond just a “clean car”. You’ll want to use a clay bar before you apply your paint sealant.
Just using soap and water will get rid of grime and dirt, but it won’t do anything to remove metals and road debris that are wedged in your topcoat.
The clay bar will pull these pieces out, leaving you with a decontaminated car.
Why is this step so important? If you skip it, then you’ll be sealing in the contaminants, keeping them around for even longer. The longer this debris is wedged in your topcoat, the more damage it does.
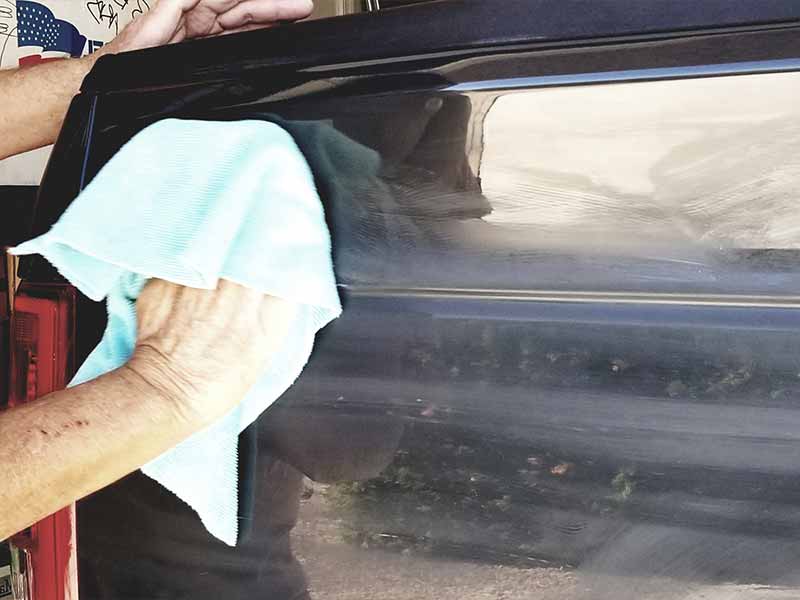
Step 2: Dry Your Car and Park it
After your car is cleaned and decontaminated, you’ll want to dry it. You can use a standard microfiber towel to wipe down your vehicle.
Your paint sealant will only work if it’s applied to a perfectly dry car. Any amount of water will dilute the solution and can cause it to run, ruining the final result.
Don’t be afraid to use a number of towels to fully dry your car.
Once dry, you should park your car in a nice, cool spot. We suggest using a garage, but a shady driveway will work too.
Step 3: Pick the Right Sealant
Before you start applying a sealant, you need to make sure you’re using the right one.
Step 4: Add a Thin Coat Across Your Vehicle
Now it’s time to apply the paint sealant. You’ll notice that you had to go through a few steps before getting to this point. The previous steps are very important. If you skip right to this point, then your car won’t get the right gleam after applying this sealant, and you’ll effectively be wasting your time.
As far as applying paint sealant, less is more. You want to apply a very thin layer across all of the painted surfaces of your car. You can use a microfiber towel, but you’ll get better results with a microfiber sponge.
The motion you use with the sponge doesn’t really matter. You can move the sponge side-to-side or use small circles to apply. As long as the layer is thin and uniform across the painted surfaces, you’re fine.
Step 5: Avoid Windows, Plastics, and Rubber
You’ll notice that we kept mentioning that you should apply it to “painted surfaces”. Sealant can do a lot of damage to unpainted parts of your car.
You absolutely need to avoid getting sealant on your windows, any unpainted plastic, or rubber trim. The first reason is that these surfaces won’t get shiny after using the product, so there’s no reason to waste your time. The more important reason is that sealant can do lasting damage to these materials, to the point of melting plastic and marring glass.
Step 6: Sit and Wait
Once applied, you don’t need to touch the sealant at all. In fact, wiping your car dry will hurt the effectiveness of the sealant.
All you need to do is wait around for at least 30 minutes. This gives your sealant enough time to dry and adds a layer of protection to your topcoat.
The dryer the sealant is, the better.
A quick way to see if the sealant is dry is to swipe your finger across a section that you applied the sealant to. Check your finger. If there is dust on your finger, then that means the sealant is dry. If your finger is wet, then you’ll need to keep waiting.
Step 7: Wipe it Down
Once the sealant is completely dry, you can wipe down your car. All this does is get rid of excess sealant in order to get the best results.
Use a microfiber towel and grab a new one when it gets too dirty.
How to Apply a Car Wax
Next, let’s discuss how to correctly apply car wax. This is a little bit more involved than the previous process.
You can wax a car by hand, but we strongly recommend using a polisher to help you. The following procedure will assume you’re using a dual-action polisher.
Step 1: Wash and Dry Your Car
Similar to applying a sealant, you want to start with a clean and dried car. That entails using a high-quality soap and water combination and a series of microfiber towels to complete the project.
Once you’re finished washing it, dry it by hand with another clean microfiber towel.
Step 2: Pick the Right Pad and Wax
There are a lot of product options when it comes to waxing your car. We suggest that you use a liquid wax because it’s easier to apply, has a smaller learning curve, and is more forgiving.
A wash-and-wax option typically isn’t the best. It provides subpar results as compared to using a true wash followed by a wax. You can opt for either synthetic or natural waxes in this case. Synthetics will last longer, but naturals tend to give a better shine.
Step 3: Put the Wax on the Pad
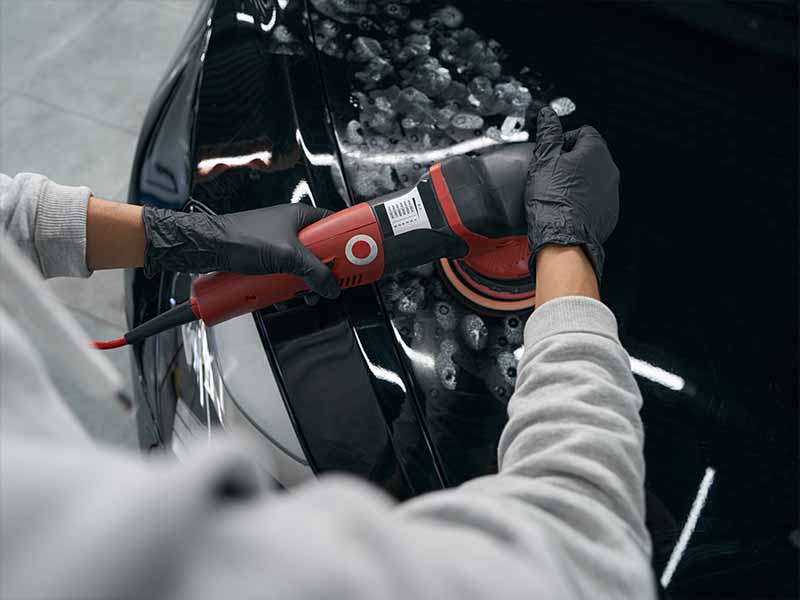
You won’t be applying this product by hand. Instead, you should use a dual-action polisher. This is a specialized hand tool that rotates very quickly.
The part that will be in contact with your car is the pad. The pad can be made of foam, microfiber, or wool.
In any case, you need to correctly apply the wax on the pad before starting. Use your finger to apply a generous layer to the surface of the pad.
It’s also a good idea to put a pea-sized dot of wax on your car in the section that you’re about to wax.
Step 4: Wax a Section of Your Car
You should wax your car one section at a time. It’s good to focus on a 1’ by 1’ area of your vehicle at a time.
The polisher will evenly distribute the wax to your car in order to get the best results. Move the machine around suing small circles as you wax across this section of your car.
Step 5: Remove the Excess Wax with a Towel
Grab a dry, clean microfiber towel. Use your hand to remove the excess wax from the area you just applied it to. Again, stick to small circular motions to get the best results.
This step is important because failure to wipe down your car will result in a hazier final look. Since the main goal of waxing is to give your car a nice polish, this step shouldn’t be ignored.
Step 6: Repeat Until Completion
You’ll need to repeat steps 3 and 4 as you continue moving around your car. Repeat the process until your entire car is fully waxed and dried.
As you continue the waxing project, you will want to occasionally check the pad on your buffer. If the pad becomes dirty, you can either quickly clean it or swap it out with another pad.
After either step, be sure to reapply wax to the pad and make sure it’s evenly saturated across the pad.
Pro Tip: Use Both a Sealant and Wax
Although we’ve been comparing these two products for this article, the truth is that you don’t need to choose between them. In fact, you should use both of these products if you want the best results.
As we mentioned, they have completely different uses and accomplish different tasks. Sealants will protect your paint while waxes will restore your topcoat and provide a great shine.
The best practice is to apply a sealant to your car and follow it up with a full wax after the car is totally dried.
We suggest waiting about 24 hours after applying the sealant. If you apply the wax too soon after the sealant, the heat and motion generated by the dual-action polisher can remove some of the sealant and worsen the results.
Helpful Links
Conclusion
As you just saw, you don’t have to choose whether you use a sealant or a wax. Instead, you should use both products in tandem to unlock the best protection for your car.
Sealants will protect your paint while waxes will get rid of small imperfections along your topcoat while giving your car a nice shine.
For more DIY detailing tips, explore the rest of our site.