Table of Contents
You might be disappointed to discover a car filled with swirls even after polishing it. Was it something you did or just a random occurrence? In this guide, we’ll walk you through the process. There are some common issues that can occur during polishing your car that can result in swirls.
If you want to avoid swirling your car while polishing and better understand where these swirls came from, keep reading. We’ll answer all your questions.
Swirl Marks After Polishing
Common Causes: Dry Polishing, Wrong Towels, Dirty Towels, Old Pad, Clogged Pad, Too Much Speed, Wrong Pad Material, Wrong Compound, Dirty Paint Surface, or Poor Technique.
What’s a Swirl Mark?
A swirl is a tiny scratch that usually has a circular path (as compared to a straight scratch mark). Swirls are found in the topcoat of your car and are typically not very deep.
In some cases, you might not even notice them until you get closer and take a look at your car’s paint. From a distance, your car might just look hazy.
How Swirls are Caused
Swirls are caused when your topcoat gets scratched by a rotating object. The topcoat is very delicate and soft. When it comes in contact with a harder object that has enough force behind it, the weaker of the two will get damaged. In almost every case, that’s the topcoat.
There’s a lot of motion and force at play when you’re polishing your car. After all, the buffer is spinning at thousands of rotations per minute. If

Why You’re Seeing Swirls After Polishing
Here’s the scenario: You just put down your polisher and completed the polishing process on your car. You take a closer look and notice swirls on your paint. Here’s a list of 11 reasons why that might have happened. We’ll also cover some simple solutions in each of these scenarios.
They Were Deeper Than You Thought
The first option is that the swirls were initially deeper than you realized. Even a high-cutting polisher can only go so deep on your topcoat. If you magnify a swirl to a larger scale, it’s easier to understand what’s happening.
Say you have a cut that’s one inch deep. If you remove a half-inch of the top surface, the cut is still present and visible. This is what’s happening on a microscale on your car’s topcoat.
In this case, the act of polishing didn’t hurt your car at all. You were just using the wrong tool for the job.
This is more common than you might think. It’s often hard to know exactly how deep a swirl is. More importantly, it’s hard to know whether a polisher will remove the swirls until you try.
Solution: Try using a cutting pad to get a deeper cut. If that still doesn’t work, you might need to take reconstructive measures to repair your topcoat and fill in or remove the swirls.
You Were Dry Polishing
Dry polishing happens when the polishing solution isn’t fully wet and saturated while you’re working on your car.
For a successful polish, the solution needs to be wet during the whole process. Residual polishing agent that’s left on your car will dry out and harden. If you come back to this section and spin your polisher on a dry spot, it will scratch up your car.
The process of drying gets sped up when you work in direct sunlight. The sun will heat up the residual solution, drying and hardening it faster.
Solution: Work in a shaded area, preferably one that’s also temperature controlled. The best results will be seen if you polish your car in a garage. Keep checking that your pad is wet. Avoid using too much polishing agent to minimize how much excess is left on your topcoat and able to dry.
Using the Wrong Towels
In the world of detailing, towels are one of the most commonly used products. They will wipe off product, apply product, clean, and dry your vehicle. They’re almost always coming in contact with your car and its topcoat.
There’s a lot of potential for towels to do serious damage to your car if you use the wrong ones.
The only towels you should have near your car are automotive-grade microfiber towels. They use a specific material and manufacturing process to ensure they’re safe to come in contact with your car.
Remember, your topcoat is very sensitive and delicate. Simply brushing against your car with a hard object can lead to scratches pretty easily.
If you use a standard towel from your bathroom, the fibers could be too coarse and rough. Using them on your car can lead to scratches and swirls across your topcoat.
Solution: If you have a towel laying around and you’re not sure if it’s safe to use on your car, don’t risk it. It’s best to stick with purchased towels that you already know are automotive-grade.
The Towels Were Dirty
As we just mentioned, microfiber towels are extensively used while detailing your car. From the first step of washing all the way to the final step of finishing your car, towels are used every step of the way.
It’s common for detailers to have buckets filled with towels to use as they detail cars. The problem occurs when these towels get dirty.
Any time a towel is used, it becomes slightly dirty. Once it hits a certain point, the trapped dirt and grime can start to damage your car.
After cleaning and drying during the polishing process, a dirty towel can scrape against your topcoat.
Solution: Always check the towel before using it. If it is too saturated or dirty, toss it to the side and grab another one. Avoid using a towel that was dropped on the ground without thoroughly washing it.
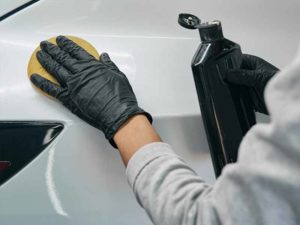
Your Pad Should Have Been Replaced
The other part of the equation is the polishing pads that you’re using. These pads are the only thing in contact with your car as you use your dual-action polisher.
Just like the towels you’re using, the pads will eventually need to be replaced and swapped out with a new one.
Removing and installing pads is a simple process. Most of them have Velcro on the back of the pad. This means that you can rip off the current pad and stick on a new one within a minute.
When you put on the new pad, make sure you prime the pad and saturate it with your polishing agent before resuming the polishing job.
It’s common to go through a few different polishing pads during a single polish. If you try to stretch out the usability of each pad, you’ll undoubtedly end up with swirls at some point.
The concept is the same as what we discussed when it comes to dirty towels — trapped grime and dirt in your pad will become weaponized and scrape against your topcoat.
With a polishing pad, it’s a little more damaging. The pad is spinning so quickly and has some force behind it. This means that a little bit of debris trapped in the pad can do so much more damage than debris on a hand towel.
Solution: Routinely check your polishing pad and replace it when it gets too dirty or saturated.
Polishing Pads Need to Be Routinely Cleaned
There’s also a window of time where the pad doesn’t need to be replaced yet, but it shouldn’t continue to be used in its current state.
In this case, you’ll need to do a quick cleaning. If you have a foam or microfiber pad, the cleaning process is pretty simple. You can use compressed air to blow off the excess material then spin the polisher to get rid of the rest.
Alternatively, use a clean cloth towel and wipe it along the surface of the pad as the polisher spins. This will clean off the surface and let you get back to work.
With tool pads, you’ll need to use a specialized spur tool. Wool pads are harder to clean because debris can get trapped deep at the root of the long fibers.
Solution: Follow the cleaning steps we highlighted in this section. Make sure you check your pads every few minutes to see if they need to be quickly cleaned or not.
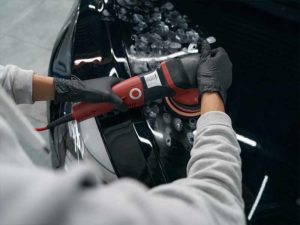
The Polisher’s Speed Was Too High
A very common misconception surrounds the speed of your polisher. A beginner might think that turning the speed up on their polisher will get them quicker and more efficient results. The truth is that speed settings are very important.
If you run the tool too fast over your car’s topcoat, you’ll do deep damage.
Pads aren’t supposed to spin too fast. The faster they spin, the more friction and force they generate. This means that they’ll cut deeper into your topcoat.
When you’re using a cutting pad that’s designed to cut deep in order to remove imperfections, that’s not a problem at all. When you’re using a polishing pad, it becomes an opportunity to cause unwanted swirls.
Polishing pads are supposed to be used on low or medium speed settings. Not only does this avoid causing swirls, but it also creates a better shine on your car. When we help beginners diagnose their swirls, the speed setting is one of the most common culprits.
Solution: When in doubt, turn the speed down. Polishing pads should be run on low or medium speed settings.
Using the Wrong Pad
Another common issue for beginner details is the matter of selecting the right pad to use. There are a variety of material options and styles of pads.
Foam pads will come in different colors which signify a different level of cutting. Using a pad that’s too aggressive for polishing can actually result in swirls.
In this case, the swirls will be created while you’re polishing your car.
When you purchase a pad, you want to pick a “polishing pad”. They’re typically blue, green, or white. Yellows and oranges are probably too aggressive for this application.
Solution: Learn more about pad selection from our guide. Double-check with an experienced detailer if you have any questions.
You Accidentally Used the Wrong Compound
Going hand-in-hand with the pad selection is the type of compound you use. For reference, the compound is the liquid that you’re applying to your car with your polisher.
Even though two compounds might look identical when they’re squeezed out, the chemistry could be vastly different. Cutting compounds use very harsh and abrasive additives. This helps cut into the topcoat deeper.
Polishers will avoid most of these abrasives while adding extra polymers for shininess. Using a compound that’s too aggressive can create new swirls along your car.
Solution: Carefully read the bottle before applying it. Preferably, you should be buying new compounds to make sure they’re fresh and you get a high-quality polishing agent.
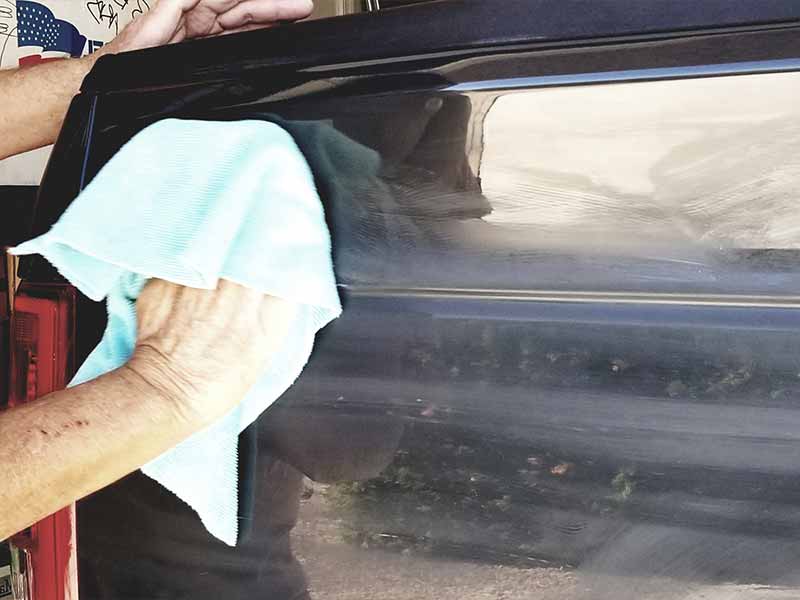
The Car Wasn’t Cleaned First
You can never polish a car that hasn’t been cleaned and dried first. This is a very important tip to remember.
Polishing a dirty car is a quick way to generate new swirls on your car. All it takes is a small piece of gravel to be present on your car. As your polisher spins around, it grabs this pebble and uses it to essentially key your car for the rest of the polishing process.
In addition, a dirty car will require you to change your pads much more often.
Make sure you thoroughly clean your car with soapy water and a nice microfiber towel. From there, use a separate batch of cleaned and dried microfiber towels to dry off your vehicle. Air drying can lead to a glaze that hurts the overall appearance.
Don’t polish your car until it’s fully cleaned and dried.
Solution: Take a few minutes to clean and dry your car before picking up your polisher. Ideally, both processes will be done back-to-back. If you washed your car last week, it can still be too dirty to polish it today.
Improper Technique Was Used with an Orbital Polisher
An orbital polisher takes a good deal of experience and knowledge to correctly use. If you hold it incorrectly, stay in one spot for too long, or use the wrong angle of approach, you can scratch your car.
Moreover, you can melt the topcoat of your car in a specific area if you’re not moving fast enough.
For these reasons, we always suggest using a dual-action polisher. The motion is more varied and it’s designed to minimize heat generation and subsequent friction. Using one of these polishers instead will reduce the risk of you marring, melting, or swirling your topcoat.
Solution: Stick to a dual-action polisher or polish your car by hand instead of using an orbital polisher. This tool isn’t very user-friendly, especially for beginner detailers.
Helpful Links
Conclusion
Now you have some tips and tricks to avoid causing swirls on your car while polishing it.
Hopefully the explanation of these scenarios helped you understand where your swirls came from in the first place.
For more beginner detailing tips, explore the rest of our site.