Table of Contents
- Cutting Pad Vs Polishing Pad
- How Cutting & Polishing Pads Work
- Quickly Explaining Cutting
- What Is a Cutting Pad?
- What Is a Polishing Pad?
- Understanding Pad Colors
- Intended Uses of Cutting Pads
- When to Use a Polishing Pad
- Make Sure You Use the Right Compound Or Polish
- Pro Tip: Start with the Least Aggressive Option
- Use a Cutting Pad then Polishing Pad
- You Don’t Need a Professional
- Mind Your Polisher’s Speed
- Helpful Links
- Conclusion
Any decent detailer can attest to the versatility of a cutting pad and polishing pad. These are arguably the two most-used pads for a variety of DIY detailers, but why? More importantly, how do these pads work and are they worth it?
In this guide, you’ll learn about cutting pads and polishing pads. Our detailing experts will explain everything you need to know in the following sections and provide some pro tips along the way.
Cutting Pad Vs Polishing Pad
The difference between a cutting pad and a polishing pad is how firm and aggressive the pad is at its ability to correct paint defects.
Polishing pads are softer and designed to restore shine to your clear coat while removing light swirls, fine scratches, and light oxidation.
Cutting pads are firmer and more aggressive pads that are ideal for removing more severe swirls, scratches, and heavier oxidation. Cutting pads should always be followed with polish and polishing pads to restore gloss and shine.
How Cutting & Polishing Pads Work
Before getting into the specifics, let’s explain what these pads will be doing and how they work.
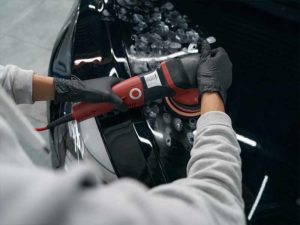
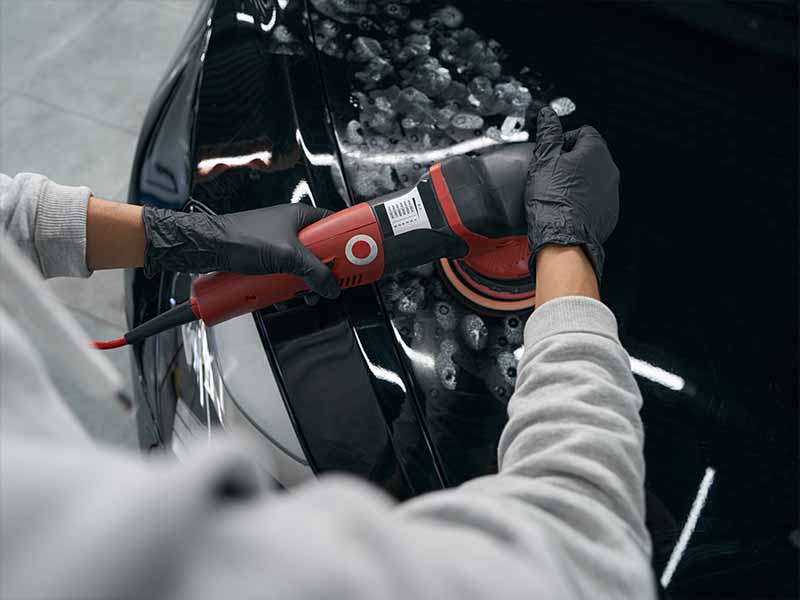
First off, you should understand that these pads are intended to be used on an orbital or dual-action polisher. These are technical names for the handheld powered polisher/buffer that you’re familiar with.
You can use a cutting or polishing pad when you wax a car by hand, but it’ll be uncomfortable. It’s a little tough to hold the pad and get a good wax when applied by hand.
Instead, you should use a special applicator sponge. These are larger and more ergonomic, making them easier to hold and use.
However, we would suggest sticking with machine buffing. It’s a lot easier, quicker, and provides the best possible results. You just need to make sure you’re using the right pad for the job.
That’s why pad selection is so important. It’s not as simple as picking a random pad off the shelf and using it. There are different material selections, geometries, and types of pads to choose from.
Why? It’s due to the nature of buffing.
When you use a pad on your buffer, the pad is doing most of the heavy lifting. The machine is spinning at a constant rate, you’re pushing the buffer at a constant pressure, but the combination of the pad and agent are where the magic happens.
The agent is the polishing solution that you choose. There are hundreds of different options on the market. The agent gets applied to your pad, then the pad distributes it across your car as you buff.
Picking a pad and agent combination depends on what you’re looking to do. Some options will remove scratches, others provide a high level of sheen, and others will create a protective layer on top of your car.
We should also mention that using the perfect agent on the wrong pad will result in a lackluster finish. Keep that in mind as we discuss cutting and polishing pads in detail.
Quickly Explaining Cutting
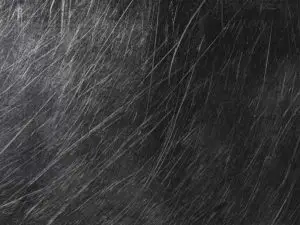
In detailing, “cutting” is a term that comes up a lot. It’s when you remove a thin layer of your topcoat, which is the clear lacquer used to protect your car’s body.
If you notice a little scratch in your car, you should cross your fingers and hope that the scratch is just in your topcoat. If this is the case, you can make the scratch disappear.
When a polisher cuts into your car, it’s shaving off your topcoat, a little bit at a time. It works just like sandpaper on a piece of wood. The friction will wear away the material a certain amount.
By cutting down your topcoat, two things are happening: you’re achieving a more uniform layer of lacquer, and you’re getting rid of surface-level defects.
With a shallow scratch, you only need to cut the topcoat a little bit until the scratch goes away. Deeper scratches require more cutting power, and some scratches are too deep to be fixed using a buffer.
 1")
What Is a Cutting Pad?
The first option to discuss is a cutting pad. It’s designed to be more abrasive. As you probably guessed based on the name, these pads cut deeper than polishing pads.
When this pad is installed on your buffer, you’ll be able to get rid of deeper scratches.
You can find either wool or foam cutting pads. Out of these materials, we’ll stick with the foam option, so the comparison is more fair.
What Is a Polishing Pad?
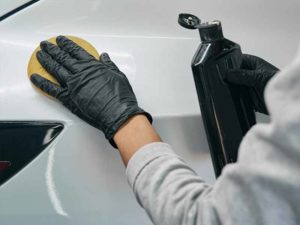
If you want to polish your car instead, you’ll stick with a polishing pad. This option is softer and squishier than cutting pads.
Instead of wool, polishing pads are made out of either foam or microfiber. Again, we’ll look at the foam option moving forward in this article.
Since a polishing pad is so soft, it doesn’t really cut into your car’s topcoat. Instead, this option will act like an applicator to evenly spread a polishing agent on your car.
It still has a little bit of cutting power (as opposed to a finishing pad, which cuts very little and strictly applies the agent). For very minor damages, it makes sense to start with a polishing pad and hope that it removes the damages.
Understanding Pad Colors
To make things a little easier, foam pad manufacturers tend to stick to certain colors. In some shops, instead of calling it a “cutting pad”, they might just call it a “blue pad”.
The colors largely have to do with the density of the pad. A more dense pad is stiffer and creates more cutting power.
For foam pads, you’ll find blue, white, and red options. Cutting pads can be either blue or white, and polishing pads are just white.
Once you start to understand the coloring system, you’re in for a surprise. Different manufacturers will often completely change their colors to stand out amongst their competitors. It makes things confusing, but you can still pick out the right pad by reading the packaging.
Intended Uses of Cutting Pads
If your car has more prevalent, deeper, and more abundant surface damage, then you’ll need to use a cutting pad. The sole purpose of a cutting pad is to grind down your topcoat and remove these damages.
Cutting pads shouldn’t be used if you’re trying to make your car look shiny. The agent used will be more abrasive and have fewer polishing qualities.
You can think of these pads as a version of coarse sandpaper. The sandpaper’s goal is to remove as much wood as possible, with no regard to how clean the wood looks afterward.
While a cutting pad won’t ruin the look of your topcoat, it certainly won’t make it look waxed after.
You should only use a cutting pad to remove scratches, swirls, and minor damages to your car’s topcoat.
When to Use a Polishing Pad
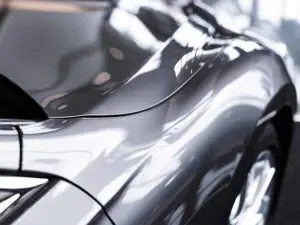
A polishing pad is very different. Instead of removing defects, this pad is used to smooth out your topcoat and add a level of shininess.
Keep in mind, a polishing pad shouldn’t be used to apply a sealant or wax. The solution used with this pad will still be a little abrasive, but it will have much more polishing power than a cutting agent.
In a standard detailing shop, a polishing pad will be used after a cutting pad. If you go back to the sandpaper example, it makes a lot of sense. A polishing pad is like a finer-grit sandpaper. It smooths out the surface after using a coarse sandpaper (cutting pad), but it still has enough grit to cut a little bit.
If your scratch is deep enough, a polishing pad will do nothing to remove it. The scratch will still be there, but the area will look shinier.
Make Sure You Use the Right Compound Or Polish
We keep bringing up the agents and compounds used in conjunction with these pads. It’s a very important concept.
If you use a cutting agent with a polishing pad, the end result will not be good. You need to make sure you pair up the agent with the pad that you’re using.
Any major manufacturer will have a label on their product that tells you exactly what pad to use. You should follow those instructions, especially if you’re a beginner in the detailing world.
Another option is to buy a bundled package. Manufacturers will include an agent and pad in the same package, removing all the potential for mismatching products.
Pro Tip: Start with the Least Aggressive Option
It’s often hard to know which pad to start with, especially if you’re a detailing beginner. That’s not a problem at all, because our pro tip is to always start with the least aggressive option.
Your topcoat is a certain thickness, and there’s nothing you can do to replenish your topcoat without going to an expert and spending a lot of money.
That means that you should aim to do as little damage as possible to this topcoat.
There are times when you might think you need an aggressive cutting pad to get rid of a scratch, but a simple polishing pad can accomplish the same goal. The difference is that the cutting pad will remove a lot more of your topcoat than the polishing pad will.
When in doubt, start with the least aggressive option. In this case, you would try a polishing pad first and see if that removes whatever surface defects. If it does, then you can pat yourself on the back.
If it doesn’t work, then you can use a cutting pad. This is just a way to minimize how much damage you do to your car’s clear coat.
Once you get more experience, you’ll have a gut feeling about which pad you should use.
Use a Cutting Pad then Polishing Pad
Whenever you use a cutting pad on your car, you should follow it up with a polishing pad. A cutting pad will make your car look hazy and can create some major streaks along your vehicle. This is where a polishing pad comes in handy.
For one, it will even out your topcoat. There could be some peaks (on a minuscule scale) in your topcoat after using a cutting pad. Remember, the cutting pad is just trying to cut deep into your topcoat, and it doesn’t care about how the car looks after.
Following up with a polishing pad will smooth out the peaks. A big part of shininess revolves around how smooth the topcoat is, and this is a good way of making the lacquer uniform.
You Don’t Need a Professional
Some people might get scared at the thought of using a polisher on their car. We’re here to say that there’s no need to call a professional if you have scratches or defects that you want to get rid of.
Once you buy a polisher, your ability to detail opens up. A single tool can handle a cutting pad or polishing pad, it’s just a matter of picking the right agents.
In cases like these, you could be saving hundreds of dollars every time you use the polisher on your own.
If you want to pare down your detailing inventory, here’s our tip: stick to just a cutting pad and polishing pad with appropriate agents. You can handle a vast majority of projects with just these two pads.
Mind Your Polisher’s Speed
If you’re using an orbital or dual-action polisher, you should be careful of the speed setting. We suggested using polishing pads after cutting pads, but you need to make sure you change your speed setting first.
Cutting pads should be used at around 5,000-6,000 OPM (oscillations per minute), and polishing pads should be used at 4,000-5,000 OPM.
Faster speeds create more heat and friction, and they cut deeper into the topcoat. Going too fast with your polishing pad might give you an uneven polish.
Helpful Links
Conclusion
Polishing pads and cutting pads aren’t competing products, they work hand-in-hand.
While you might be able to get the job done with just one or the other, we’d suggest keeping both stocked in your garage.
Explore our site for more DIY detailing guides and learn how to make the most of your detailing inventory.