Table of Contents
One of the most common tools in a detailer’s toolbox is detailing clay. However, there are a lot of DIY detailers who don’t know the power of this product. It could be the piece of your detailing puzzle that’s missing.
Today, we’re talking about clay bars, how they work, and exactly how to use them.
What Is A Clay Bar?
A detailing clay is a product used to decontaminate car paint. It is used to remove bonded microscopic contaminants from your finish that a car wash alone can’t remove. It is lightly rubbed across the paint with the aid of a lubricant and pulls these contaminants off of the car’s surface by embedding them into the clay.
It is typically made of a synthetic engineered resin but could be made from natural materials. It feels like a firm putty and can be shaped, molded, and ripped apart relatively easily — a lot like Play-Doh.
 1")
How Does Clay Bar Treatment Work?
A clay bar treatment is a mechanical paint decontamination process. The main purpose of a clay bar treatment is to remove contaminants from your car’s surface. If you look at the surface of your car under a microscope, you’ll may find contaminants such as brake dust, industrial fallout, embedded dirt, bug guts, tree sap, road tar, and even paint overspray.
Most clay bar kits will typically come packaged in a bundle with a specialized lubricant spray. The clay lubricant allows the detailing clay to glide across the paint surface without scratching the finish, but remove contaminants that are embedded on the surface that a normal car wash can’t remove effectively.
To put it simply, a clay bar is a must-have item when it comes to paint decontamination.
Detailing clay works by rubbing it across your car with the protective lubrication of clay lubricant. As it moves, the surface contaminants are lifted out of your car’s paint and trapped in the clay. The end result of the claying process is an exceptionally clean surface that car washes can’t provide.
A rough visual of this idea is if you had a layer of sand with metal flakes in it. In this example, the sand is your car’s topcoat and the metal flakes are various contaminants. You can pass a strong magnet across the sand and pull out all the metal flakes. The magnet, of course, is the clay bar.
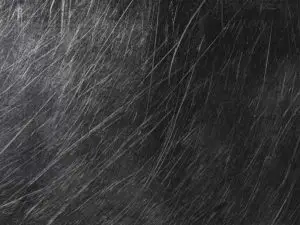
In fact, you can see the results of your clay bar pretty well. After using it enough, the cleaning surface of the detailing clay will turn black and have embedded bits of brake dust and other contaminants in it. These were all previously trapped on the surface of your car.
The Right Time To Use Detailing Clay
Before using a clay bar, it makes sense for you when you should use it. This isn’t a regular car cleaning product that you use frequently. It’s best to only perform a clay bar treatment before applying paint protection such as wax or a ceramic coating. You will also want to clay bar your car before beginning the polishing process.
Even in these circumstances it may not be necessary to use detailing clay. A simple test to see if your finish could benefit from a clay bar treatment is to use a plastic sandwich bag to feel the roughness of the surface of your vehicle’s finish. If it doesn’t feel glassy-smooth and has a slightly rough texture, you know it’s time to break out the detailing clay and clay bar lubricant.
It’s a process that fills the gap between a full carwash and a professional wax. Since the clay bar is used to remove surface impurities, it can only be used after you thoroughly wash and dry your car. By doing this, you’ll expose the impurities and get all the dirt and grime out of the way.
However, a clay bar shouldn’t be used on a car that was just waxed or polished. Unfortunately, it can’t tell the difference between embedded metal and a fresh coat of wax — the bar will pull the wax away from your car. The right time to use a clay bar is right after washing your car and right before waxing it.
It’s also smart to perform a clay bar treatment prior to polishing swirl marks and fine scratches from your paintwork. The reason is you don’t want your polisher getting the abrasive contaminants embedded in the polishing pad and creating the very swirl marks and scratches you’re trying to remove.
Who Needs a Clay Bar?
Every time you drive your car on the road, there are a number of external attacks on your topcoat. Tiny flakes of metal, gravel, industrial pollution, debris, salts, and even dust can wreak havoc on your car’s paint.
At highway speeds, a piece of dust you can’t even see can get trapped in your topcoat and won’t be removed by a typical car wash.
In some cases, you can feel these contaminants with your finger. Next time you’ve finished washing and drying your car, grab a plastic bag gently run your finger across your hood inside the bag and see if you notice any roughness. This rough texture is embedded particles that only a more advanced detailing treatment like a clay bar treatment can safely remove.
The truth is that anyone who owns a car that they drive regularly could benefit from a clay bar. Using it is easy, they’re inexpensive, and they help remove unwanted contaminants from your vehicle.
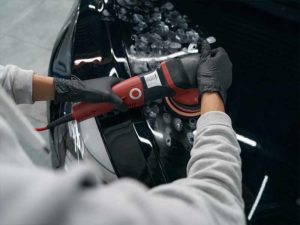
Steps To Use A Clay Bar
To help you understand the use of clay bars, we’ll explain the process. The following steps will show you exactly how to use a clay bar. The operation is pretty universal, so you can apply this same set of steps to your vehicle, no matter what it is.
Step 1: Wash and Dry Your Car
It all starts with a thorough car wash. The bar is only used after your car is properly cleaned, so that means it’s time to clean your car.
You can clean it any way you typically do, but there are two big things to keep in mind:
- Don’t apply a wax, sealant, or polishing solution after cleaning your car.
- Completely dry your car (either use a forced air dryer or a microfiber towel).
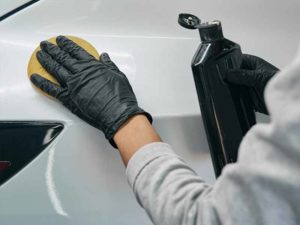
Step 2: Prepare The Detailing Clay
Once your car is cleaned and dried, you can start preparing your clay bar. How you handle the bar is up to you. Since it comes in a chunk, you have the ability to mold it to make it more comfortable.
A lot of detailers will break off a piece of the clay bar (around a 1-inch cube) and smooth it out into a thin layer of material, roughly the length and width of their hand. Doing this allows you to hold the clay bar as if it were a small towel.
You will be reusing a single piece of clay, so you’ll only need to prepare one piece at this time.
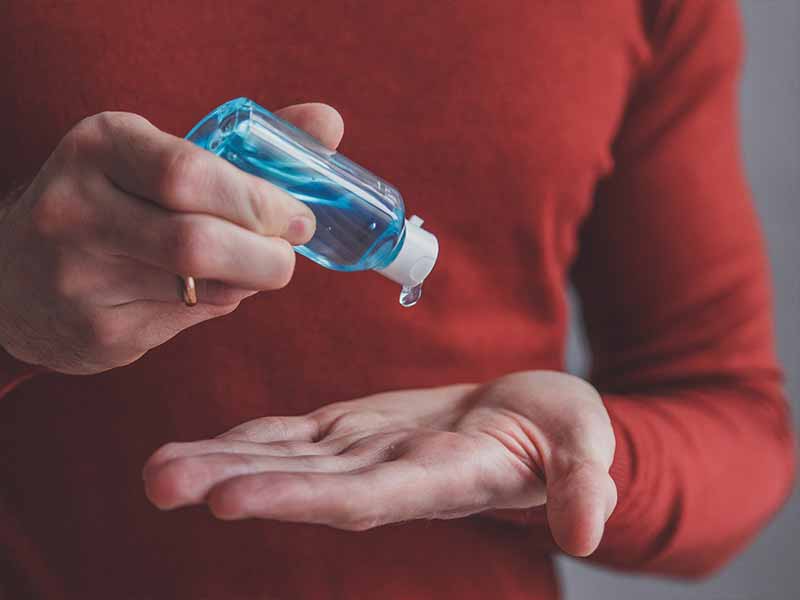
Step 3: Spray the Area
We should start by saying that you want to apply your clay bar to a small area at a time. This ensures you can give each part of your car the same amount of focus without missing a spot. We suggest working in an area of about 1 ft x 1 ft. Take a moment to pick out your starting section (perhaps the bottom-right quadrant of your hood).
Spray this area with a generous amount of the included lubricant.
This lubricant is very important. Without it, your clay bar can do damage to your car’s paint. When the lubricant is applied, your bar will glide across your car instead of getting bound and caught on your topcoat.
Step 4: Gently Slide the Bar
When you’re dealing with your bar, you’ll be holding one side and cleaning with the other side. Remember which side is which in order to get the best results.
As far as physically using the bar, it should be a gentle sliding motion. There’s no benefit of applying extra pressure or force as you slide across your car. That will just ruin the process.
You’ll do a number of glides back and forth in each section. Each pass will pick up a few more particles.
In the first few passes, it might feel a little rough. You’re feeling the debris getting picked up by the clay bar.
Step 5: Fold the Bar and Keep Cleaning
After a few passes, check the cleaning side of your clay bar piece. If it looks pretty dirty, there’s a quick way to get a clean side:
Fold the bar in half twice, then flatten it back out. You just folded in all the particles to the center of the clay bar you’re using, so you should have another clean side to work with.
After doing this enough times, you might notice that your clay bar is dirty even after folding and flattening it. This means that your piece is ready to be replaced with a fresh piece of clay bar. Since you’re using such a small section of the overall bar, feel free to replace your piece often as you’d like.
Using the same piece for too long might start adding impurities to your topcoat instead of removing them.
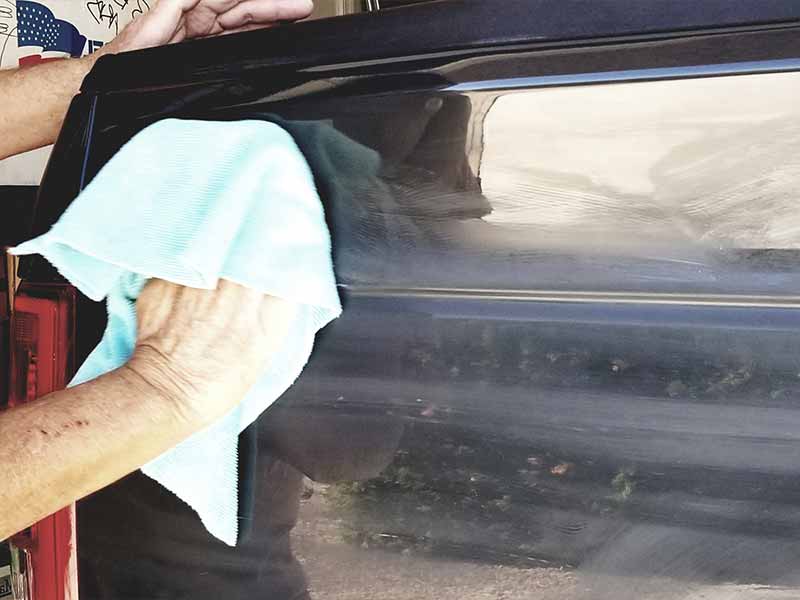
Step 6: Dry the Area
Once you’ve used the clay bar across the section, grab a microfiber towel. Use it to dry the section, which is now wet from the lubricant spray that you used in step 3.
Letting the lubrication spray air dry isn’t the end of the world. It just might disrupt your wax later and it could result in some smearing across your paint.
Step 7: Move to the Next Section
Now, simply repeat steps 3 through 6 for the rest of your car. Remember to focus on a 1 ft x 1 ft section at a time. As you progress across your car, the difference is going to become very noticeable.
Step 8: Finish the Detail
The final step in the process is usually to apply your paint protection of choice. Whether that is wax, paint sealant, or a ceramic coating.
Clay Bar Alternatives
We mentioned earlier that a clay bar treatment is a mechanical paint decontamination process. The primary alternative to this mechanical method of decontamination is chemical decontamination.
Iron remover is what is used to decontaminate paint chemically. It will not be able to remove all of the contaminants that a clay bar can, but it will neutralize all of the iron particles that collect on your paint’s surface from rail dust, brake dust, industrial fallout, and other sources of microscopic iron particles.
Another method of mechanical decontamination is cleaner wax. Cleaner waxes are a harsher method of decontamination than the gentle clay bar treatment. Cleaner waxes are really a combination of wax and polish. The are abrasive and will grind away contaminants along with a thin layer of your clear coat.
Unlike clay bars, a cleaner wax can remove scratches that are very minor.
Helpful Links
Conclusion
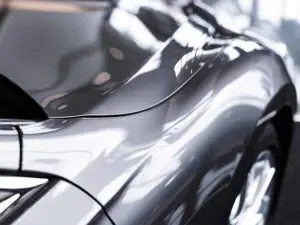
At this point, you know what detailing clay is, how it works, how to use it, and how useful it is for any driver. With a clay bar in your garage, your cars will look even better, and you’ll protect your vehicle’s finish. It’s the best product for paint decontamination on the market.
For more DIY detail guides, explore our blog.