Table of Contents
How do you apply ceramic car coatings? Let’s start with an overview. There are 2 stages to applying a ceramic coating to your car or truck:
Preparing the Surface
Applying the Coating
The most involved stage is
Preparing the Surface
. It’s key that your paint is prepared properly to allow your ceramic coat to adhere well and last. Contaminants on the surface prior to coating can reduce durabilityApplying the Coating
is fairly straightforward but still requires working carefully. Ceramic coatings are sensitive to temperature so not working within the temperature parameters listed by your coating manufacturer can make the process difficult. The coating is simply wiped on and then buffed away in small sections.Professional detailers and installers have access to more advanced ceramic coatings. These aren’t available to the DIY community due to being more difficult to apply. They may require specialized equipment such as curing heaters or have more narrow working times. Advanced ceramics will last longer typically but cost more and can’t be applied by just anyone.
Preparing the Surface
The point of preparing the surface is to remove anything that will prevent the ceramic coating from adhering to the surface. Also, you should address any paint imperfections prior to applying the coating or you won’t be able to correct them without removing it.
The following steps are a comprehensive list of how to thoroughly prepare your vehicle for coating. Some may consider this overkill and others will consider it essential. Just remember, ensuring your car is properly prepared will ensure that your coating lasts and gives you the results you’re looking to achieve.
Steps to Prepare a Car or Truck for a Ceramic Coating
Step 1: Wash

Step 2: Iron Remover
Once your car is thoroughly washed you should use iron remover to remove iron particles embedded on top of and in the clear coat. Iron fallout comes most commonly from brake pads on all the cars on the road but it can also come from trains and industrial sites.
Using iron remover is simple to do. Simply spray it on and allow it to work its magic. It will change color as it reacts with the iron particles. Follow the directions on the iron remover product you use for how long it should sit. Once it has done its job simply rinse it away with water from your pressure washer or garden hose.
Step 3: Clay Bar
Clay bars are wonderful at removing surface contamination. They work by gliding a special clay-like substance across the surface of your car or truck and grabbing particles sitting on the surface of your paint and embedding them in the clay. You need a lubricant that will allow the clay bar to glide over the surface without sticking.
I personally find clay barring paintwork to be very satisfying. Unless your vehicle is brand new or you’re an accomplished detailer, you’ll be amazed at how much your clay bar picks up. You’ll also be amazed at how smooth your paint surface will feel when you’re done.
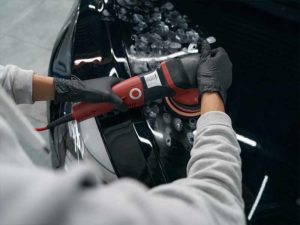
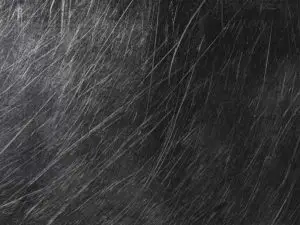
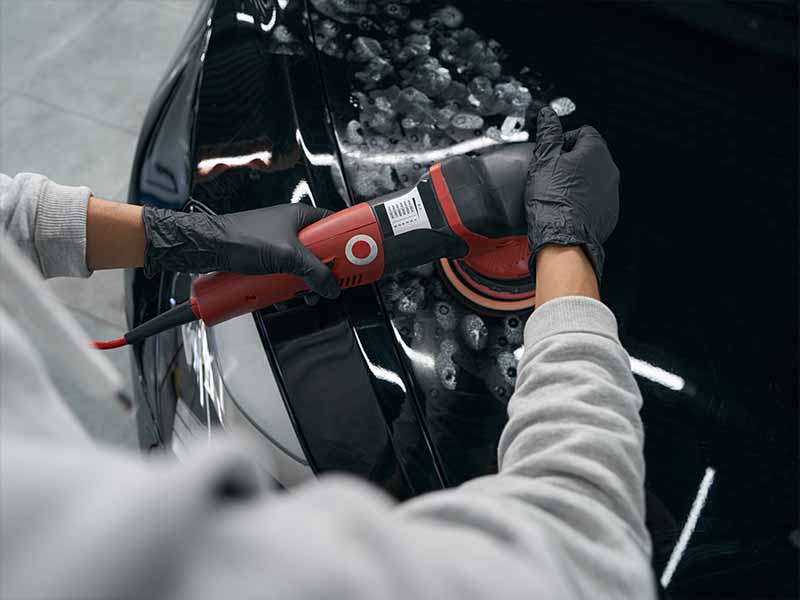
Step 4: Paint Correction
The purpose of paint correction is to remove fine swirls and scratches from your clear coat prior to applying the semi-permanent ceramic coating. Once the ceramic coating has been applied, defects in your clear coat won’t be able to be fixed.
Paint correction is done by using an electric dual action polisher to polish away a thin layer from the surface of your clear coat. Unless your car is was built in the 1980’s or earlier you should have a reasonably thick clear coat that will allow you to safely do this.
Paint correction can be intimidating for many. It’s easier to do than you think. The key is to keep the polishing pad even with the paint surface and not apply much pressure. Let the polisher and the polish do the work. A good quality polisher makes the job easy because it will stop spinning if too much pressure is applied.
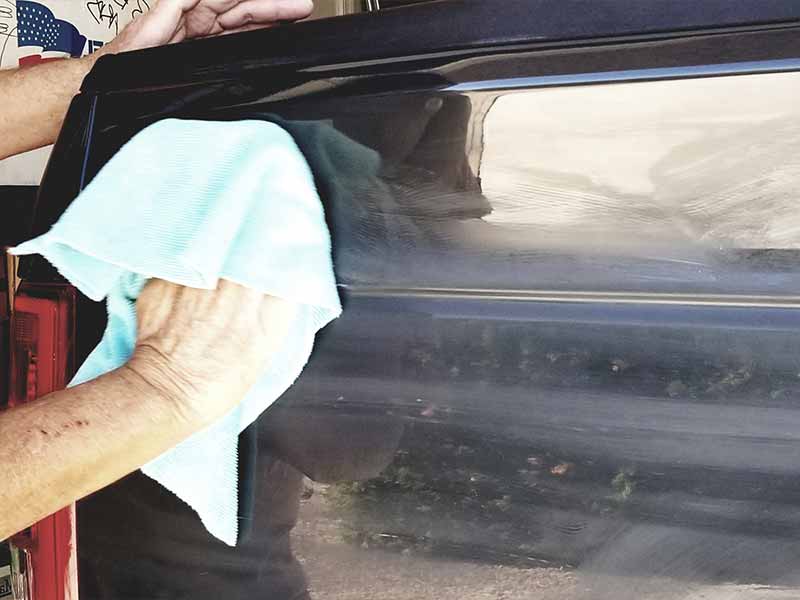
Step 5: IPA Wipe Down
IPA refers to performing an isopropyl alcohol wipe down. The purpose of this is to remove any residual waxes or oils that remain. It’s the final step in ensuring that your paintwork is as clean as possible and will allow the ceramic coating to adhere as best as it can.
You’ll need some distilled water and some isopropyl alcohol which can be purchased at your local drug store. Buy the highest alcohol content you can. You should be able to find 90% or greater isopropyl alcohol. If you can’t find any that high it’s okay to use a lower grade. You’ll also want a spray bottle and a few microfiber rags. Mix the alcohol and distilled water in a ratio of 50/50 in the spray bottle. Spray on the surface and wipe away with a microfiber towel.
If you don’t want to bother mixing the alcohol and distilled water there are several surface preps on the market that you can use instead. Probably the best bang for the buck option is the Wipe Out Surface Cleanser Spray by Chemical Guys. There are other great options on the market from well-known brands such as Mothers, McKee’s, and GYEON. Of course Adam’s, CarPro, and Gtechniq all make surface prep sprays if you want to keep things all-in-the-family so to speak.
Applying the Coating
Most of the work is behind you. Preparing for application is the hard part. The overview of the application process is a simple wipe-on wipe-off. There are some details that are critical to applying ceramic coatings and you should always read the instructions for the particular coating that you are using.
Some general cautions and tips:
- Work in shade
- Work on small 2’x2′ sections
- A little goes a long way
- Applying in a crosshatching pattern helps ensure even coverage
Steps to Apply a Ceramic Coating
Step 1: Location
Ensure you’re in a shaded spot and the temperature is moderate – not extremely hot or cold. Direct sun will cause ceramic coatings to cure far too fast and not give you enough working time to buff them off the finish.
Extreme temperatures will also affect the working time and make application difficult at best, or ruin it and your finish at worst.
Step 2: Mask Off Non-Painted Areas
Once a ceramic coating touches a surface, it isn’t going to be easily removed. It’s well worth the time spent to mask off areas with some blue painters tape that will be challenging to avoid getting coating on.
Plastic trim, rubber, even glass is good to mask off.
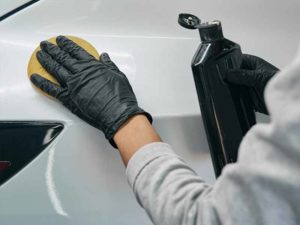
Step 3: Apply Coating to the Applicator
Dab a few drops evenly across the applicator. Your ceramic coating likely will have an applicator provided. If it doesn’t you can use a generic microfiber applicator pad or even a microfiber towel.
Just know that once ceramic coating has touched your microfiber towel or applicator you won’t be able to reuse it for future detailing chores.
Step 4: Apply to a 2’x2’ section
Working time varies from ceramic coating to ceramic coating. Also ease of application and buffing will vary as well. It’s best to limit application to areas no larger than 2 feet by 2 feet to ensure that the area you’re focused on is manageable.
It’s also a good idea to apply the coating in a crosshatch pattern. The reason for this is it will better ensure complete and even coverage. What I mean by crosshatch is to wipe on the coating in slightly overlapping horizontal lines and then wipe over the same 2×2 area in vertical lines. Add drops to the applicator as needed
Step 5: Buff Away
Once your coating has flashed or been allowed to sit for the appropriate amount of time indicated in the directions, simply buff it away.
Use a microfiber towel you don’t plan on using again for buffing. Once the ceramic coating gets on microfiber it won’t be coming off and that will prevent the microfibers from doing their job in the future for other detailing tasks.
Step 6: Repeat Steps 4 and 5 Until Complete
Be sure to continue to work in 2×2 sections and ensure that you overlap slightly to ensure that you don’t miss any areas.
Step 7: Allow to Cure
Each coating will have a curing time where you should avoid contact with water. This could be 48 hours or more. You’ll need to be prepared for this important step. You’ll need to avoid rain, sprinklers, and any other way your car or truck might get wet. Even dew should be avoided.
Ceramic Coating Maintenance
Ceramic coatings are great for helping protect your paint but they need maintenance themselves. This may at first seem counterintuitive since part of the point of a ceramic coating is to reduce maintenance. Once a ceramic coating has been applied to your car or truck it will require very little to help keep it in good condition.
There are 2 main aspects to maintain a ceramic coating:
- Avoiding Contact: Avoiding things that will damage or prematurely wear away the coating
- Maintenance Toppers: Applying a maintenance product on top of the coating to protect it and improve its performance
Avoiding Contact
Avoiding damage is fairly obvious for the most part. Things that come into physical contact with your finish can reduce its effectiveness by wearing it away.
Avoid automatic car washes with brushes. Soft cloth automatic car washes are preferred if you must use an automatic wash but you’re still exposing your coating to physical contact.
There are also touchless automatic car washes that use stronger detergents to help break down the bond of dirt and road grime. Ceramic coatings are usually very tolerant of chemicals and this would likely be the best choice for an automatic car wash. The high-powered water jets combined with the stronger detergents and the ability of the ceramic coating to help prevent tar, bugs, and other road grim from adhering well to your finish should get your car or truck cleaned reasonably well.
The best approach is a hand wash with the proper car wash shampoo and tools to minimize the chance of grinding dirt and road grime on the surface and wearing away the coating.
Also avoid leaning against your car or truck. It’s also wise to try to mind where you frequently touch your vehicle such as around handles, hoods, tailgates, lift gates, etc.
Maintenance Toppers
Maintenance topper products are usually produced by ceramic coating manufacturers to match well with their ceramic coating product. Ceramic coatings will lose their hydrophobic properties some with time and the topper will help restore its ability to shed water and more easily repel road grime that can adhere to your finish.
Frequency of how often these should be applied varies between products and how much abuse your coating receives over time. It’s not uncommon to apply a maintenance topper after each regular wash but you may find that you can go much longer between applications.
It’s also not uncommon for detailers to apply a topper shortly after applying the ceramic coating. This is done because it enhances the hydrophobic properties and shine. The ceramic coating should be fully cured before this is done though.
Frequently Asked Questions
Can I apply ceramic coating myself?
Absolutely! It is a lot of work but it is well within the ability of the typical DIY detailer. A ceramic coating requires a great deal of prep work and a lot of patience. If you have the patience and the fortitude to deal with a lot of prep work to ensure the coating adheres properly, you’re the right detailer for the job.
Is it hard to apply ceramic coating?
Yes and no. It’s only hard because of the amount of prep work involved to ensure that once your vehicle is ceramic coated, it will perform well and last for a long time. There aren’t any particularly tricky steps involved. The most challenging part buffing the coating off once applied.
If you’ve waxed a car, which I imagine you have if you’re considering doing this yourself, it’s a fairly similar process. You wipe the product on and then you buff it off, leaving a protective coating. You need to work in small 2 foot by 2 foot sections to ensure that you can buff the ceramic away before it becomes too difficult to remove. Some ceramic coats are more difficult to buff than others. Some are naturally more tacky and resistant to buffing and will slow the process down, meaning you may want to work in even smaller sections.
If you’re concerned, start working in a less conspicuous and very small area. Get a feel for how easy or difficult the coating is to buff away. Expand your working area slowly up to the 2 foot by 2 foot amount and adjust back down if you need.
How long does ceramic coating last?
The longevity of ceramic coatings varies widely. There are some cheap products on the market that may only last a month while some professional-grade coatings are touted to last more than 10 years!
Consumer-grade or DIY coatings typically last from 1 to 3 years but some last even longer. Adam’s UV Ceramic Paint Coating for instance lasts beyond 5 years.
Professional-grade coatings don’t always last longer or perform better than DIY coatings. You’ll also pay quite a bit of money to have a professional apply it due to the amount of work involved.
Do your research before you pull the trigger on any particular coating.
How long does it take to ceramic coat a car?
The proper question to ask here is, how long does it take to prepare a car to be ceramic coated. It’s the prep work that takes the most time. The entire process can easily take a day or more, especially if you’re very detail-oriented.
Prep requires a thorough washing, a multistep decontamination process, paint correction (if necessary), and finally an isopropyl alcohol wipe down to ensure the surface is pristine and free of oils.
Application is simple in comparison. Wipe on the ceramic liquid in minute amounts and cover a 2’x2′ area. Buff that area and repeat until the entire surface is coated.
Curing of your ceramic coating will also take some time. Cure time will vary from manufacturer to manufacturer but you can typically expect to need to keep water away from your car or truck for a minimum of 24 hours. More likely it’ll be closer to 48 hours. Water can ruin your ceramic coating if it comes in contact with it before it is fully cured.
I’m slow and it takes me an afternoon to prep and a few hours to put on the coating. Having the right tools will speed the process up.
How many coats of ceramic coating can you apply?
The answer to this question varies depending on the brand of ceramic coating you’re using. Some coatings will work well when multiple coats are applied. Others won’t because the coating isn’t able to bond to itself, meaning that if you attempt to apply another layer it won’t stick and you’re wasting your time and money.
Research your brand of ceramic coating to see if it can be layered if this is something you’re interested in doing. Some coatings will perform better with multiple coats.
In general, multiple coats aren’t necessary and even when detailers apply multiple coats, they usually only apply a total of 2.
Can you wax over ceramic coating?
Sure but it isn’t necessary. A ceramic coating is designed to replace the need for a wax or paint sealant. You can apply wax if you want to try to get a deeper and more wet looking shine.
My recommendation here is to look into ceramic coating toppers. These are specifically designed to enhance the hydrophobic properties and shine of ceramic coatings. These purpose-designed toppers will do a far better job of enhancing your finish and they will likely last longer than carnauba wax.
What is the best ceramic coating?
Best is a relative term. There are a lot of things to consider such as cost, shine, beading, longevity, ease of application, durability, and more.
Some would say that professional-grade coatings that can only be installed by a certified detailer are best. Usually these are extremely expensive though but they also can perform better and last longer than consumer-grade coating.
There are a huge number of do-it-yourself consumer-grade ceramic coatings on the market. A few of these are absolutely stellar performers and rival many of the professional-grade coatings. Most however fall in the fair to lackluster category.
CarPro CQuartz UK 3.0 is generally accepted as one of the best coatings a DIYer can buy today. I agree. It seems to shine and bead better than any other coating without a topper helping it make up the difference. It does have 2 downsides however. One is that is a little more difficult to buff off than some others, meaning you may need to work on smaller sections and take longer to apply. The other is the lifespan is only 2 years or so. If you don’t mind reapplying every couple of years it’s not a problem. 2 years is actually quite a long time.
Adam’s UV Ceramic Paint Coating is a better choice for most in my opinion. Shine and beading is excellent even if it isn’t quite as good as CQuartz. It’s easier to put on which is good for those applying a ceramic coat for the first time. It also has an ultraviolet pigment added which allows you to use the Adam’s UV Flashlight to inspect your coating and see if you missed any places or don’t have as consistent of a coating as you might like.
Gtechniq Crystal Serum Light is Gtechniq’s top-of-the-line DIY ceramic coating. They make some amazing products and Crystal Serum Light is a stellar performer. It’s very easy to apply and allows for a little extra working time, which means you can work on larger sections without as much concern. It produces a great shine as well as excellent beading, even if it isn’t as good as CQuartz. It lasts 2 years or more which is only slightly better than CQuartz but far behind Adam’s.
All 3 of these ceramic coatings are excellent choices and what I consider to be the best. You couldn’t go wrong choosing any of them.
Are ceramic coatings worth it?
Yes, very much so. Personally, I’m a little old school and prefer to just use a quality paint sealant. My paint protection of choice is Wolfgang’s Deep Gloss Paint Sealant. It holds up for 2 years and doesn’t require a lot of prep work to put on. It’s also not finicky to apply and buff away.
That said, Adam’s UV Ceramic Paint Coating lasts 5 years, is easy to put on (for a ceramic coating), has better hydrophobic properties, makes washing easier, and can better protect from fine scratches and swirls.
Ceramics are clearly superior despite the significant prep work involved.
Helpful Links
Conclusion
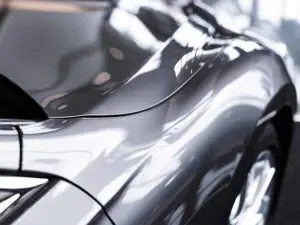
By now you should have an in-depth understanding of how to apply ceramic coating like a champ. A properly applied coating will create a shield that protects your car or truck for years and makes washing easier.
It’s no small job to properly ceramic coat a vehicle. The prep work is where most of the work is involved. There are many steps required to ensure that the finish is contaminant-free so that the coating will adhere properly and ensure the coating gives the best results.
The actual application of the coating is fairly easy but some coatings can be a little more difficult than others. As long as you’re working in the shade and it’s not unusually hot or cold the working time of the ceramic shouldn’t make application a challenge.
Do your research before purchasing a coating to ensure it’s a good quality coating that will perform well and last a long time. Once you’re happy with your choice, be sure you have the right tools for the job and give yourself ample time to get the job done properly. If you follow this guide and the manufacturer’s recommendations you shouldn’t have any trouble.