Table of Contents
- How To Apply Touch Up Paint To Car Scratches And Stone Chips
- Car paint layers explained
- Best car paint chip repair kit
- Steps to touch up car paint with a touch up pen or brush
- Touch up paint pen vs brush or spray
- Tips on how to use a touch up paint pen
- Rubbing compound vs leveler vs wet sanding
- Is clear coat necessary for touch up
- How to smooth out touch up paint on car
- How to repair stone chips on metallic paint
- Waxing after touch up paint
- How to touch up tri-coat paint
- Using a dual action polisher for touch up paint
- Paint chip repair tool
- Helpful Links
- Conclusion
Unless you NEVER drive your car or truck in the real world, you have small chips and scratches on your finish.
Many people just ignore these and move on. These are people that aren’t as passionate about their vehicle as you or I am. These small blemishes can really ruin an otherwise pristine looking ride.
Having your car resprayed is not cheap and my personal experience has been disappointing when dealing with local body shops and their car paintwork skills.
How To Apply Touch Up Paint To Car Scratches And Stone Chips
- Use a high quality touch up paint repair kit
- Practice and test the color match
- Prepare the scratch or chip
- Apply primer and wait 20 minutes
- Apply touch up paint and wait 20 minutes
- Apply clear coat and wait 20 minutes
- Smooth out the touched up area with either leveling solvent or wet sanding
The fact is that they don’t care about my car as much as I care about my car. If I can avoid having portions of my car repainted that is the route I’m going to take.
The good news is that touch up paint repair kits have gotten much easier to use and the results have also gotten a lot better. The best car paint chip repair kit we’ve found is available from PaintScratch.com.
If you’re nervous about trying to fix these blemishes yourself, don’t. Even a bad touch up paint job is going to make the situation better than doing nothing at all in most cases.
Car paint layers explained

Before we get started we need to make sure you understand the different layers of paint on your car or truck.
The first layer applied to the metal or plastic of the body of your vehicle is primer. Primer is a type of car paint that is designed to bond well with the metal or plastic and give the colored car paint an ideal surface to be applied on.
The next layer is the colored paint. There are usually several layers of this paint.
The final layer is the clear coat. Clear coat is essentially a protective layer. It allows the colored paint to show through but creates a sacrificial layer above that small scratches and chips will now show as badly.
Scratches that only affect the clear coat can usually be polished out and won’t need touch up car paint. 3M makes a great scratch removal kit which can be ideal for dealing with small issues in your clear coat.
Scratches that go through the clear coat down to the color can possibly get away with simply applying some clear coat touch up but more often than not will need a layer or two of touch up paint applied.
Scratches and chips that dig through to the primer will need touch up paint and clear coat.
Scratches that expose bare metal or plastic will require a layer of primer before applying touch up paint and clear coat.
Also, if bare metal has been exposed rust has likely begun and will need to be removed prior to applying primer.
Best car paint chip repair kit
There are different types of touch up kits available on the market and many work quite well. The main differences are in how the touch up paint is applied. Some use a touch up pen, which is my personal preference. Some provide or require a brush. Others may even require special equipment to spray the touch up paint.
PaintScratch.com provides what I consider to be the most appropriate and comprehensive package of options available for touching up your automotive paint. You can choose whether you want to use a touch up pen, brush, or spray. Also, they offer primer in these forms as an option if you need it. Not to mention, they have a color match guarantee and use PPG car paints.
Steps to touch up car paint with a touch up pen or brush
1. Use a high quality touch up paint repair kit
If you don’t have properly matched and high quality paint and all the tools you need then you’re wasting your time.
A good touch up paint repair kit will be matched to your car or truck’s exact paint color, will include clear coat, and will include a method of smoothing out the touch up paint.
We recommend getting your touch up kit from PaintScratch.com and choosing the touch up pen option.
You can get a perfect match to your paint color by providing them your paint code. If you don’t know what it is you can easily find your paint code from the database on the PaintScratch.com website.

2. Practice and test the color match
The point of practicing is to get used to the flow of car paint. Touch up pens are my preferred tool. If you haven’t tested how the paint flows from the pen you can easily apply too much paint. This might seem like a step you can skip but it’s worth taking the 30 seconds it takes to make sure you get a feel for the paint flow. Trust me.
Apply a bit of your chosen touch up paint to something with a shiny surface that you can use to compare the color to your car or truck finish. A porcelain mug is a good test object.
3. Prepare the scratch or chip
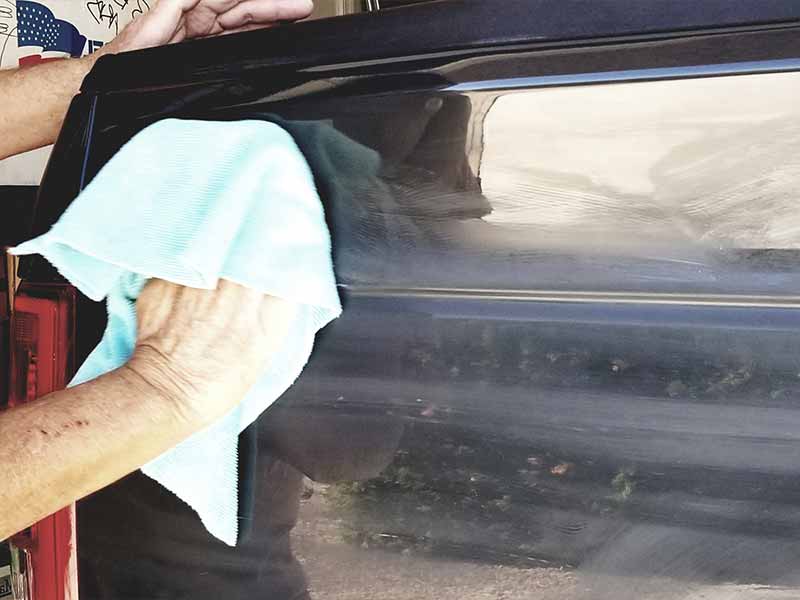
It’s a good idea to give your car a good wash prior to attempting to touch up a scratch or chip. This will remove a lot of contaminants that could get trapped in the touch up paint and make it look rough.
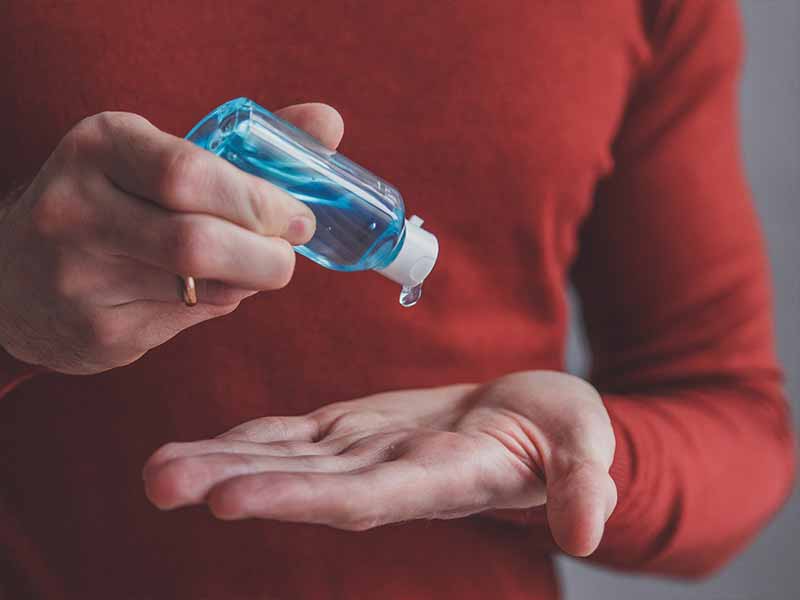
For the best results you’ll need to strip away any wax or sealant from the immediate area. Use isopropyl alcohol or a good degreaser to remove these protective coatings in and around the scratch or chip.
If the scratch or chip has exposed bare metal and rust has started to develop you’ll need to sand that away.
It can be difficult to get all of the rust out but a very inexpensive sanding pen is the ideal tool for removing rust from tiny nooks and crannies without damaging other areas.
Sometimes there will be roughened edges around scratch or chip. This is especially true of plastic bumper covers.
These rough spots should be sanded down to ensure there are no bits of paint or plastic that stick up above the surface of the normal finish.
A sanding pen may work well here but larger chips may require a 250 grit sandpaper.

4. Apply primer/touch up paint/clear coat
Before starting the next step, be sure that you’re not working in direct sunlight. You should be working in a shaded area such as a garage or car port. The humidity should be low and the temperature should be at least 50 degrees.
If your scratch or chip has exposed bare metal you’ll want to apply a small amount of primer to the exposed metal.
If no metal has been exposed you can skip applying primer and apply the touch up paint to the scratch or chip.
You should apply a few coats allowing a minimum of 20 minutes between each application. Be sure not to build the layers up above the rim of the scratch or chip to leave room to apply clear coat. Clear ensures that the paint color appearance will match and also provide protection.
Once you’ve added enough touch up paint, apply several coats of clear on top. You will need to wait a minimum of 10 minutes between applying coats. Be sure to use minimal pressure when applying clear coat since it can affect the touch up paint beneath. Clear coat will soften the previously dried colored touch up paint so be gentle.
If your car is from the mid 1980’s or is older you’ll need to determine if your car has a clear coat or if it is a single stage paint. One method for determining if you have a single stage paint is to rub it with a white cotton cloth. If it is a single stage paint it should leave some color on the cloth.
If you’re touching up paint on a car or truck with a single stage paint you’ll won’t apply any clear coat. You will have to way a few days for the touch up paint to cure and then you can go over it with a compound to level it out.
5. How to smooth out touch up paint on car
When applying the clear coat either with a pen or a brush you should end up with some clear coat above the level of the rest of the clear coat that was originally applied to the car.
PaintScratch.com kits come with a compound that is used to polish away the excess clear coat and blend the touched up area with the surrounding clear coat.
Other kits may use a solvent or recommend wet sanding. Solvents work by dissolving away excess clear coat while wiping over the surface where the touch up has been applied. Wet sanding involves using different very fine grades of sand paper with water sprayed onto the surface to wear away the excess touch up.
Touch up paint pen vs brush or spray
These 3 methods of touching up scratches or chips are meant for different applications. They aren’t meant to be interchangeable.
- Touch up pens are meant for dealing with scratches and chips that are the size of a pencil eraser or smaller.
- Touching up chips with a paint brush is meant for dealing with chips the size of a pencil eraser up to the size of a US Dime.
- Touching up chips with spray paint is meant for dealing with anything larger than the size of a dime.
You can interchange these somewhat. For instance, you can touch up small chips that are smaller than a pencil eraser with a brush but you’ll find it more difficult than using a touch up paint pen.
Small chips and scratches are easily addressed with a touch up pen and personally I prefer to stay in that range. When issues get larger than what a touch up pen can handle I begin to weigh the pros and cons of having the entire section in question resprayed by a good body shop.
You may be more willing to attempt to tackle larger jobs on your own but if you do you’ll have more success if you’re using the proper tools.
Tips on how to use a touch up paint pen
- Make sure to shake the paint pen well to mix the car paint inside thoroughly
- Practice getting a feel for the flow of paint out of the pen before applying to the scratch or chip
- Don’t fully depress the paint pen nib in the chip or scratch or too much paint will flow
- Tap or dab the pen a small amount to lay a thin coat down within the scratch or chip
- Allow each layer to dry for at least 20 minutes
- Apply several thin coats of color before moving on to the clear coat
- Allow each coat to dry for at least 20 minutes prior to applying the next coat
- If you find that the layers of color you’ve applied are lumpy you may need to use a leveler to smooth it out before applying the clear coat
- Before applying clear coat be sure the color coats have thoroughly dried
- A clear coat pen will not need to be shaken but otherwise it will work the same
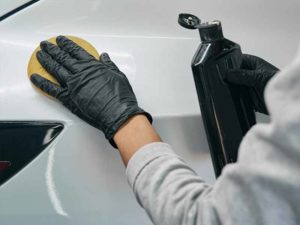
Rubbing compound vs leveler vs wet sanding
All of these methods are tried and true ways to level out the paint on your touch up job. Rubbing compound is my preferred method because I find it to be the easiest and safest personally. Rubbing compound will polish both the touched up area as well as the surrounding original finish to help blend in the area that was fixed.
Rubbing compound is basically just a liquid polish that when rubbed will wear away excess paint or clear coat.
Wet sanding is very similar to rubbing compound but you’re using a sandpaper with the grit equivalent of compound. Instead of a liquid it’s on a piece of material. I find it a little less forgiving than rubbing compound because you have to maintain the lubrication and you still might end up with some light scratching if you’re not careful.
A leveling solvent is a specially formulated paint thinner of sorts. It will dissolve away excess paint and clear coat when wiped across the touched up area with a good quality microfiber cloth and some pressure. This is a perfectly adequate method but it will not do much for blending the touched up area into the original paint. All it will do is knock down the touch up paint and clear coat to even with the factory paint surface.

Rubbing compound for leveling touch up paint
As I mentioned earlier, rubbing compound is my preferred method for leveling touchup paint. It’s very forgiving and does a better job of blending the touched up area with the surrounding original paint.
To use it you can apply some to a microfiber polishing pad or microfiber rag and begin applying pressure. It’s best to wipe in straight lines that go from the front of the car to the back of the car. Try not to use any more pressure than necessary to get the desired results.
Leveler solvent for leveling touch up paint
Solvent is a good alternative to rubbing compound. It is safe to use and shouldn’t damage your original clear coat.
You can use it the same way you would use rubbing compound. Apply several dabs to a microfiber pad or microfiber rag and begin wiping in over the fixed area in line with the car from front to back. The solvent will soften the touched up area and allow you to knock it down to the desired level.
Wet sanding for leveling touch up paint
Taking sand paper to your car’s or truck’s paint sounds crazy at first but it isn’t much different than using a quality polishing compound. Polishing compound or a chemical leveler are often used with touch up paint to smooth out the touch up job and blend the touch up paint with the original paint.
1500 grit sandpaper and a spray bottle are the tools you’ll need to wet sand an area you’ve touched up instead of using polishing compound or another leveler.
Once the new paint has thoroughly dried spray the area well with water. Next gently work the sandpaper across the area to knock down high spots to in line with the surrounding clear coat. The water is applied to help keep buildup from clogging the sandpaper and causing more damage to your finish. Be sure to respray the area with water to keep the sandpaper free of grit.
Is clear coat necessary for touch up
For the best results you’ll want to be sure that you use a touch up kit that includes clear coat. Cars and trucks produced since the mid 1980’s have included a clear coat over top of the colored paint layers. If you don’t replace this layer your touch up paint will appear different than the surrounding paint and stand out from the rest of the vehicle.
How to smooth out touch up paint on car
In addition to how the paint is applied, another big difference is how the touch up paint is leveled when applied.
There are essentially 2 ways in which touch up paint is leveled. Wiping with a leveling solvent or polishing with a rubbing compound. A more advanced method is wet sanding but we’ll stick to leveling with solvents and polishes.
In this article we’re not going to delve into the less common ways to apply touch up paint. We’re going to stick with touch up paint that is applied with a touch up pen or brush.
How to repair stone chips on metallic paint
For small chips and scratches you don’t need to worry about the metallic flakes and matching. The truth is that the metallic flakes will not lay down in a manner similar to how the sprayed on OEM paint metal flakes did but if the affected areas are very small this shouldn’t be very noticeable. The only way to get the metallic flake to lay properly is to spray the paint onto the surface.
Waxing after touch up paint
It’s best to let touch up paint cure for at least 30 days before you apply a fresh coat of wax, paint sealant, or ceramic coating. Gasses release from new paint over time and if they can’t escape they can cause a bubbling look to the fresh paint. This is a bit excessive advice if I’m honest but you’re better off waiting if you can.
How to touch up tri-coat paint
Tri-coat paint is similar to modern paint but adds an additional layer of paint called the mid coat. The mid coat is applied on top of the base coat, also known as the paint color, but below the clear coat. The mid coat isn’t a solid color and is essentially just a layer of colored tint on top of the base coat.
This can be a very difficult paint to touch up but if you’re willing to practice first you can pull it off. The reason this is so difficult is that you’ll need to practice determining how much mid coat needs to be applied to get the right final look. This is complicated by the fact that applying clear coat over the top of the mid coat will change the color again.
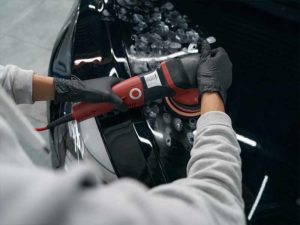
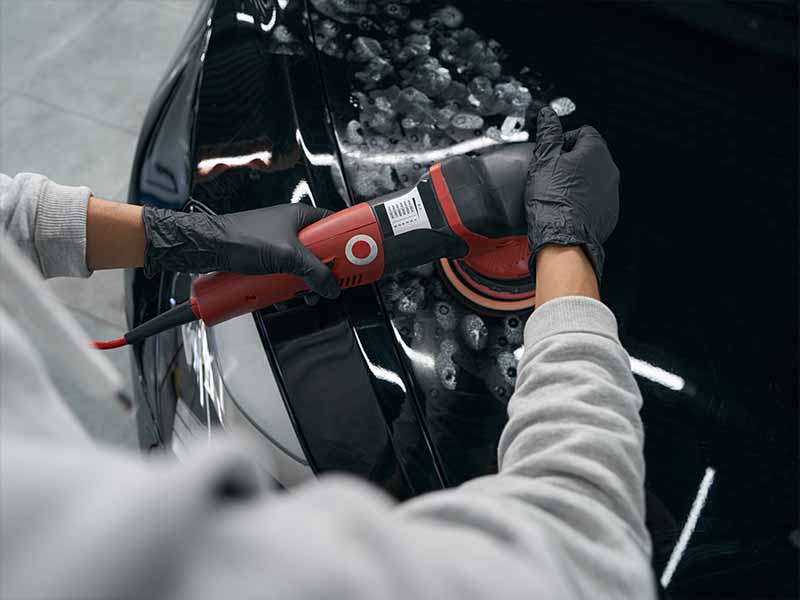
Using a dual action polisher for touch up paint
A polisher or power buffer is usually overkill for leveling touch up paint unless you have a lot of chips and scratches over a large area. If this is the case you’ll probably need to purchase a larger quantity of a very fine polish.
If you don’t have a polisher and have a big touch up job to tackle it may be worth picking one up. They’re typically priced a little over $100 for a good one which isn’t too bad considering they’re great for polishing out swirls and scratches when the need arises. A good DA polisher is a must-have tool for any serious detailer.
Paint chip repair tool
Some people swear by this paint chip repair tool. It’s a great option for small chips if you don’t have a paint pen. You fill the reservoir with your touch up paint and dab it into small chips or scratches. It’s ideal for applying a very small amount into a paint scratch or chip.
It isn’t really much better than a paint pen in my opinion but it is great if you have touch up paint in a bottle and need a way to easily control applying paint into small chips and crevices.
It’s very inexpensive and if you’re purchasing paint in a bottle because you have spots that are bigger than a pencil eraser that you need to brush paint into but also have some small spots to address, it’s a good addition to your touchup arsenal.
Helpful Links
Conclusion
Knowing how to properly touch up rock chips and small scratches automotive paint is something you really need to know how to do if you’re serious about keeping your car or truck looking its best. Having a good quality car paint chip repair kit and the patience to do the job right is key to getting the best results.
Don’t be afraid to give it a shot. It’s not as difficult as it may seem. Take your time and make sure to allow the layers to dry thoroughly before applying the next one. Even a mediocre touch up job will look better than no attempt at all.