Table of Contents
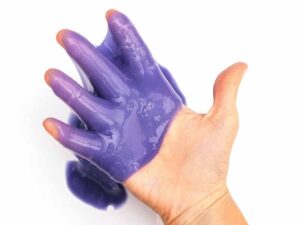
Of all the products out there you could use we have Armor All. A reasonably inexpensive product that promises shine and comes in several different product offerings. However, not everyone likes Armor All, no do they want the greasy film it tends to leave behind. When it comes to car care there are certainly better product offerings out there.
Armor All for interior plastics is ok and all but when you don’t want it there what do you use? How to remove Armor All is the topic for this article and we hope to dive in and get you a cleaner car without them Armor All products getting in the way.
How To Remove Armor All
Now that we know what supplies we need, it’s time to tackle all these parts and maybe even some dust while we’re at it. Let’s dive into step 1.
Step 1
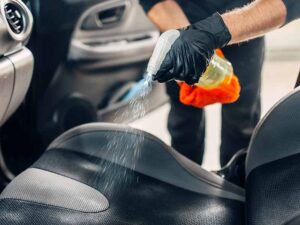
You can either use a good all-purpose-cleaner or you can make your own. If you want to make your own you can make a mixture of about two quarts of warm water, one and a half cups of white vinegar, and one teaspoon of dish soap. This or an all-purpose-cleaner is great for removing Armor All. They both have the power to cut through the chemical protectants in Armor All and allow them to release their bond with the surface they’ve been applied onto.
Step 2
It’s important to try and keep your microfiber rag damp as this will help make sure you are always attacking that Armor All instead of absorbing the Armor All Protectant into the nap of the microfiber.
Just in case though make sure to test it on a small area before getting started. You would not want to inadvertently damage your car or it’s plastic even though this mixture is pretty safe. Also, make sure not to take the damp rag to any electronics as that will definitely not go over well. Stick to the plastic only.
Once you’re satisfied it’ll be safe on the surface you’re cleaning, simply take your cloth and dip it in your mixture, and wipe down everywhere you can with the Armor All on it. Or take your spray bottle and lightly spray your towel, then wipe it down. The idea is to get all the plastic wiped down and remove as much as you can from your car.
You may need to repeat this process depending on how much protectant was applied to the surface. One wipe down will probably get the job done but it won’t hurt to give it a second wipe to ensure there aren’t any spots you missed or stubborn spots.
Step 3
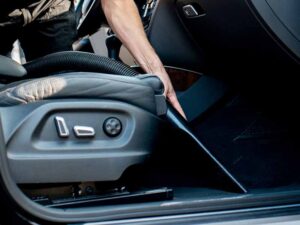
Once you’ve finished wiping down the surface with your cleaner of choice, grab a fresh microfiber rag and thoroughly dry the area. Be sure to get down into any cracks or crevices too. If after you’ve dried the area thoroughly you notice some spots that didn’t get the protectant completely removed, give those spots a quick wipe again with your cleaner and dry once more.
Step 4
You’re essentially done at this point. But most people remove Armor All because they didn’t like the shiny look. You also don’t want to leave the surface you’d previously applied the protectant onto unprotected. Assuming you were removing it from a plastic or rubber, our favorite protectant is 303 Aerospace for its pleasing matte appearance and excellent UV protection.
Things You Can Use
There are some simple products that you can use to clean the Armor All off. All of these should be fine for your car care needs, and to get everything back to a pre-Armor All look.
- All-Purpose Cleaner – Our favorite is Meguiar’s All-Purpose Cleaner
- DIY Cleaner – Here’s what you’ll need to make your own cleaner
- Bucket – This will be for your cleaning mixture.
- White Vinegar – White vinegar has so many uses and it really has a great purpose here.
- Dish Soap – Working together with the white vinegar, the dish soap is going to really help clean things up.
- Warm Water – The white vinegar and dish soap will need to be thinned out so good old fashion H2O will come in handy here.
- Microfiber Rag – Something you can use to wipe your cleaner mixture across your dash and any other location. Microfiber is the best choice because of its ultra-absorbent deep nap. Plus you can wash and reuse them for other detailing tasks.
- Spray Bottle (Optional) – You may want to put some of that cleaner you have made into a spray bottle just to make it easier to apply on your towel without having to deal with a bucket nearby. It’s best not to spray cleaner directly onto the surface you want to clean since it tends to land in places you might not want it to go.
All Purpose Cleaner
Meguiar’s All Purpose Cleaner
Our favorite all-purpose cleaner for detailing will also do an excellent job of stripping Armor All off most surfaces without making a mess.
 1")
Microfiber Towels
The Rag Company “Creature”
The Rag Company makes the best microfiber detailing towels without being crazy expensive. You’ll need a few of these when removing Armor All.
Armor All Alternative
303 Aerospace Protectant
Our recommendation for an Armor All alternative is Aerospace 303 Protectant. It protects from UV damage and leaves a nice matte finish.
What Is In Armor All?
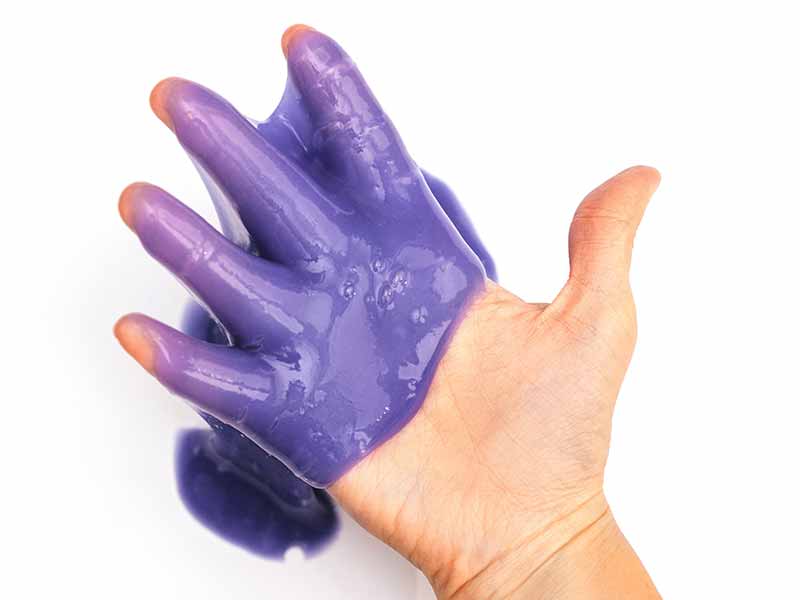
First, let’s clear up some things about Armor All real quick. Although it works well Armor All contains water, silicone, diethylene glycol, glycerin, and various other chemical compounds. Armor All wipes on leather especially can really leave behind some less than desirable results.
It is because of those chemicals that a greasy type of residue is left behind. Also if you need to use different products for plastic, leather, vinyl, and any other surface then it is best to apply more appropriate products whenever you can especially on those classic beautiful rides.
There are some out there who like the stuff, in fact, there are people who have been using it for 15 years or longer on their car surfaces. For those of you however that prefer other products and a different way of doing things, let’s get on with how to remove Armor All once and for all.
Helpful Links
Conclusion
Based on the assumption you have read this whole guide and received all the knowledge we have to give you, you are now ready to remove all that Armor All. This is a pretty easy job that shouldn’t be all that bad, just keep in mind it could be time-consuming depending on how many times you have to keep wiping things down.
Once you get it though you can now move on to better products that you may enjoy more and care for your car in whatever way you deem fit. However, if you need some help with that feel free to visit some of my other guides right here on this website and I will be sure to steer you in the right direction. If you need a spot to get started feel free to read my Ultimate DIY detailing guide, it’s a doozy but it is chock-full of great information for you. Until then happy cleaning and good luck with all of your car care projects.