Table of Contents
- How To Remove Car Decals Without Damaging Paint
- Start with a “clean” slate
- Weapons Of Choice - Hair Dryer & Solvent
- The Ultimate Decal Removal Tool - Plastic Razor Blades
- Alternate Option - Dental Floss
- Another Tool - Thin Plastic Card
- The Tool For Big Jobs - 3M Decal Eraser Tool
- A warning about paint fade
- Finishing Up
- Helpful Links
- Conclusion
I really hate the decals that car dealers apply to cars to promote their dealership. The local Ford dealer used to go so far as to pop rivet a plastic emblem to all of the cars they sold! They’ve stopped doing this, likely because of all of the rusted out body panels they caused. But I digress.
Decals aren’t just those that car dealers apply but some that maybe you’ve applied yourself or possibly make and model emblems applied by the manufacturer.
How To Remove Car Decals Without Damaging Paint
- Wash the area with the decal thoroughly
- Warm the decal with a hairdryer
- Use a plastic razor blade or credit card to gently left the decal
- Continue lifting the decal and applying heat as needed
- Once the decal has been completely removed, use a paint-safe solvent such as Goo Gone to remove any remaining adhesive
- Wash the area again once all the adhesive has been removed
There are plenty of reasons for wanting to remove a sticker or emblem from your car or truck. What you’ve come here to find out is how to do it without ruining the surface that it has been applied onto. This could be a painted body panel, a window, a plastic bumper or trim piece, etc.
The best advice I can give you right up front is to not use a razor blade. A razor blade can damage your clear coat, plastic, or most any other surface the sticker is applied on.
The only surface that’s safe to use a razor blade is glass but even then I don’t recommend it since it is very easy to seriously slice yourself. Besides, there are easier ways to get the job done and deal with the glue.
Continue reading to learn more.
Start with a “clean” slate
It’s a good idea to wash your car prior to beginning to debadge or remove decals from your car or truck. If you’re not familiar with the 2 bucket method you check out our article describing how to wash your car without scratching it.
The reason for washing your car or truck first is that you’ll want to remove as much dirt and grime as possible from around the area of the badges to prevent the possibility of grinding grit into the clear coat and creating fine swirls and scratches.
You’ll want to do your best to clean around the edges of the decals and emblems if you can. Often dirt and road debris collects in these edges and removing as much as possible here is ideal for limiting the potential for scratching your finish.
Weapons Of Choice - Hair Dryer & Solvent
Gentle heat is a great way to make easy work of removing most decals. You may consider using a heat gun but a heat gun is significantly more powerful than a hair dryer and may cause problems by damaging your clear coat or warping plastic.
A hair dryer should be gentle enough to avoid these problems except in the most extreme situations. The way this method works is by heating up the decal and causing the glue affixing it to your car to soften. You can then fairly easily peel away the decal.
You’ll probably be left with some glue or adhesive residue. Goo Gone or the more powerful Citrol 266 will make short work of cleaning off the leftover sticky mess.
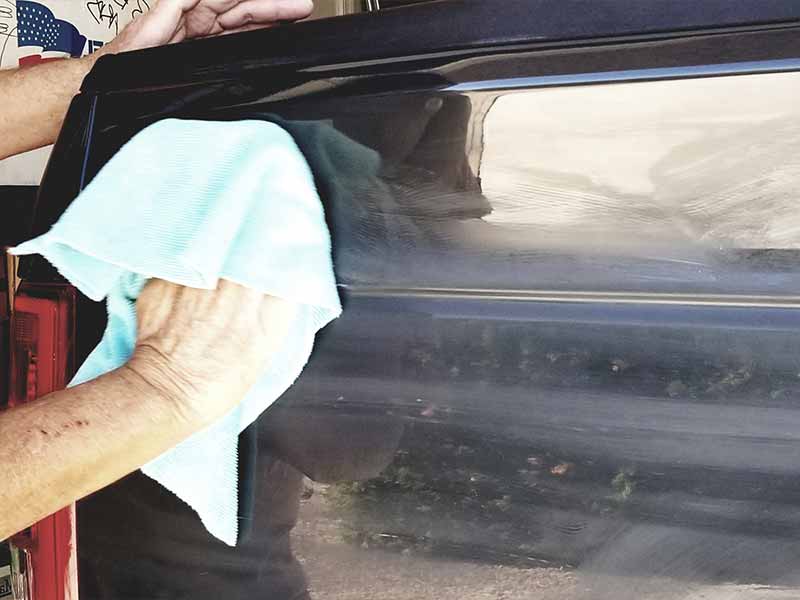
Use a good microfiber towel to wipe away the excess Goo Gone or Citrol 266 and remove the softened adhesive. Using microfiber is best because it will be the most gentile on the surface of your finish and prevent potential scratches.
Microfiber is good about grabbing and trapping particulates and keeping them from being ground into your paintwork.

The Ultimate Decal Removal Tool - Plastic Razor Blades
Real razor blades are a poor option for removing decals and badges because they can damage your finish, slip and nick molding or trim, or worse, slip and slice you!
Plastic razor blades are a purpose-built tool specifically for removing decals and they’re really cheap. They typically come with a great handle and several replacement blades.
Whether you’re doing a large job or a small job, having a good set of plastic razor blades handy will make the task infinitely easier.
They’re so cheap we actually recommend purchasing a large pack of plastic razor blades to keep on hand for all kinds of detailing tasks as well as other non-automotive tasks you have.
If you want to save a dollar or two then a small pack of plastic razor blades will do just fine.
Alternate Option - Dental Floss
For debadging thicker glued on items such as a manufacturer logo or model emblem, dental floss can be used to saw the badge away from the surface. You may want to also use a little heat to help soften the glue.
Dental floss with the addition of heat should help speed up the process. Some people step up from dental floss to fishing line. Fishing line is very strong and comes in some very thin diameters.
You may want to spray on some Goo Gone or Citrol 266 to help loosen the emblem or badge prior to starting. This will soften the edges of the exposed adhesive and make it easier to get started.
Just like with decals, you’ll be left with some adhesive that Goo Gone or Citrol 266 can easily clean off.
Another Tool - Thin Plastic Card
If dental floss or fishing line aren’t handy or working well and you don’t have any plastic razor blades you can consider a thin plastic card. A credit card is probably too thick to be as effective as you’d like but a thinner card like a frequent shopper card is ideal.
It’s usually quite rigid but still pretty thin while very easy to maneuver underneath a decal or emblem. You probably don’t want to use a card that you need to use for its intended purpose afterward since it is quite likely to get pretty beat up and covered with old adhesive.
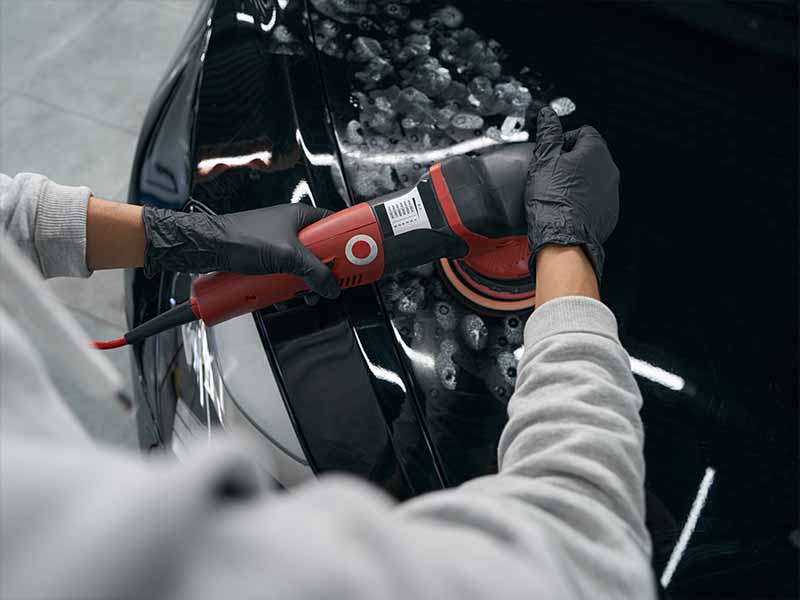
The Tool For Big Jobs - 3M Decal Eraser Tool
The 3M Decal Eraser Tool drill attachment does a good job of making short work of decals. It should be noted that it requires a great deal of care when used to ensure that the finish of your car or truck is not damaged.
Follow all directions when using this tool. It works by friction and basically grabs and rips bits of the decal off the surface of the vehicle.
I have not personally used one of these tools so I can’t vouch for how effective it is but based on my research it does work fairly well without damaging the paint if used properly.
If you have a large job it may be worth picking one of these up and giving it a try.
A warning about paint fade
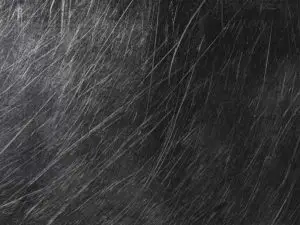
Before you remove a decal you need to be aware of one big issue – the sun has likely faded the material around the decal more than underneath it. What I mean is that unless you’re removing a decal from a window, when you remove the sticker or emblem you will likely be able to still see where the decal lived.
If the car is new or the decal has not been applied for a significant period of time then you probably won’t have this problem. Long ago I had a 1986 Honda CRX Si. I bought it used and it had those vinyl pin stripes applied to it from nose to tail.
The car was probably 6 or 7 years old when I bought it and decided to peel off the pin stripes. When I did it the red paint was subtly darker where the pin stripes had previously been applied. It wasn’t so obvious that most people would notice. This was especially true since it followed the lines of the car.
I will say that I often noticed it when I walked up to the car. Newer cars may not suffer as much from this problem with the advancements in paint and UV protection. But this is something that you may want to consider if you’re on the fence about removing the decal anyhow.

A quick Google search turned up several forum posts of people that are still experiencing this problem. I looked for some example images and didn’t turn up much although I did find a post on an Australian detailing forum you can check out to see what I’m talking about. I also included one of the photos here that I thought best represented a real world look at the problem. Special thanks to JK71 for sharing these helpful images with the Internet at large.
Your mileage may vary but if you’re concerned about this you may want to do a test on a small area before fully committing.
Finishing Up
Once you’re happy with the results you’ll want to wash the area thoroughly again. Your goal here is to remove any leftover Goo Gone or Citrol 266 as well as any last bits of adhesive.
You should also apply your paint protection of choice to the area you’ve been working. If you don’t have a solid go to for paint protection our best suggestion is to use Wolfgang Deep Gloss Paint Sealant. It’s a synthetic liquid that is easy to apply and should last for well beyond a year in typical climates and conditions.
Helpful Links
Conclusion
Removing decals and badges will vary in difficulty depending on the size and shape of the sticker or emblem. Also, age can greatly affect how difficult it will be to remove.
Extremely thin vinyl cut lettering that is very old can be brittle and not easily peeled away without cracking and breaking. It’s important to remember to go slow and be patient. Getting frustrated will not help the situation and likely just lead to more potential for damaging your clear coat.
Our best suggestion is to liberally apply Citrol 266 and heat whether you’re dealing with a decal or badge. This will soften the glue and make removal much easier. Working a plastic razor blade underneath should make removal a snap.
Cleaning away the leftover sticky residue is best done with a good quality microfiber towel. Microfiber is the best product for protecting your finish from swirls and scratches when wiping on the surface of your clear coat.
As with most jobs, having the right tools when tackling a task makes things go much easier and produces better results. If you don’t have the tools necessary it’s best to postpone the job until you can get those things that you need. This will spare your paint as well as your patience.