Table of Contents
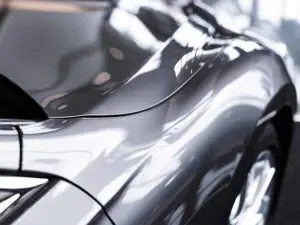
Protecting your car’s paint job is almost as important as the car itself to some people. A car after all is a huge investment, so keeping it looking nice, shiny, and polished is important. This is where a clear coat comes in handy. The clear coat is crucial to numerous paints just like the paint on your car.
Over time though and like everything else, it tends to wear out. In order to keep a clear coat looking good and doing its job, it is important to remove and repair clear coat to optimize its protection.
In this short guide, I hope to assist you in being able to remove clear coat without damaging the paint while reapplying and protecting both the paint and clear coat to minimize the intervals of maintenance for both.
Repairing Clear Coat Step-by-Step
In the following, we will list what you need to do in order to perform the clear coat repair. Before we dive in however it is important to remember this is a very delicate procedure. Try not to be too heavy-handed and the goal here is to only remove the top layer. Going too hard especially in the sanding section may not only remove the clear coat but also the paint, and the undercoat. This will ultimately cause several other issues that will just be a pain to deal with.
Step 1: Prep
When beginning your clear coat job, it is a wise move to do some simple yet effective prep work and to gather your supplies. By doing so it will make the clear coat that much easier and faster to fix. With this being such a careful process, it’s best to take all the short cuts you can get you’ll need them. Below are some recommended supplies to have when working with removing the clear coat, and repair the damage.
- Sandpaper (multiple grit sandpaper) – The sandpaper will play an important part in the removal of the clear coat. Having multiple grit sandpaper available will also help the process go smoother. You will want to try and have 400, 800, 1,000, and 1,200 grit sandpaper. This is a good spread and will make clear coat removal that much more of a breeze. Be careful though any grit can potentially cause damage beyond the clear coat, but more on that later.
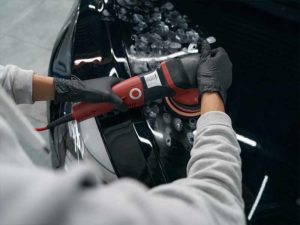
- Electric Polisher – Having a good electric polisher such as the Porter-Cable 7424XP that I recommend, this polisher will help make the whole removal and repair process go much faster and smoother.
- Washing Hose – A good washing hose can go a long way to simplifying the process too. Nothing to be super technical on, just something to keep in mind.
- Water – Nothing special here, just good old fashioned H2O
- Wool Pads (Optional) – Pads that are made from 100% wool are the best here. These are to be used when you don’t have access to an electric polisher or just want to put a more manual touch.
- Detailer – A good detailing spray will be helpful on the polished spots to bring out the nice finish.
Now that you know what you need you can dive into the job at hand. First, start soaking some of the sandpaper, this will help speed up the time later on when it is time to use that. Once that is done let’s start on the automobile.
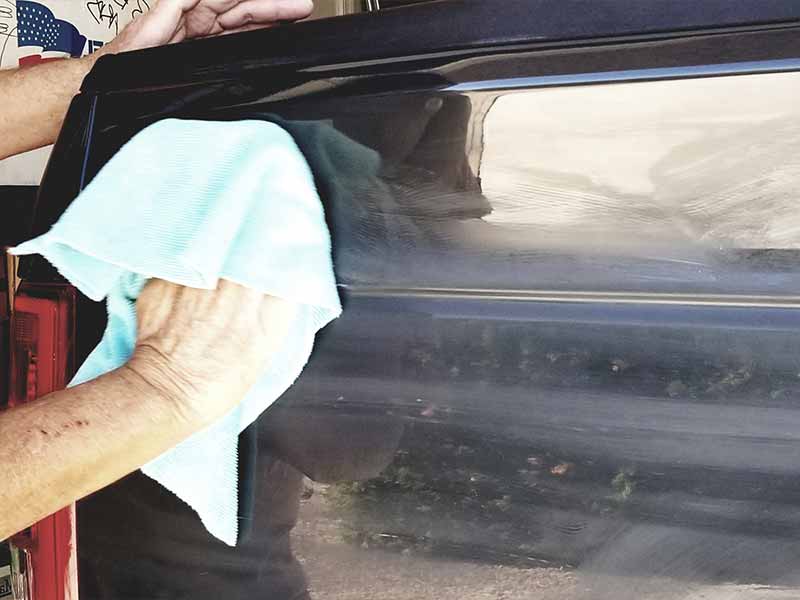
Step 2: Wash
When it comes to most projects washing is a good first step. When working with your clear coat and paint job this is no exception. You want to remove that dirt, grime, and other residues so you’re working with a nice clean surface. This will also spot any slight damage you may not have seen before.
There are some guides I wrote about car washing, like my Washing A Car By Hand and Washing A Car With A Pressure Washer, but really you just want to get a good solid wash to remove anything that may interfere with the clear coat and any embellishment on the paint. The idea here is that you want a nice clean and dry surface. Once your done washing, remember to allow the car to dry completely before continuing on.
Step 3: Wet Sanding
Now let’s get back to that sandpaper that has been soaking. When it is time to wet sand it is important you take your time. As previously mentioned this entire process is delicate but none more so then the wet sand portion. It will lay the foundation for removing the clear coat, and making your paint that much brighter. Starting with the 400 grit sandpaper you want to move over the car rubbing gently. The idea is to gradually start to weaken the clear coat. As you rub over the car you will start to remove the clear coating paint. This is probably the most important step to get right so it will take the most amount of time.
As the common theme throughout this post, it is best to really take your time sanding, not to sound repetitive, it’s just too much and you go beyond the peeling clear coat and into something else entirely. Save the time now by being careful with the wet sanding especially with the different grit and gradually removing that clear coat without causing damage to the paint.
When you’re done with the wet sanding and peeling clear throughout the whole car you can move up to the higher grits. Sanding the whole car, it will seem like you are sanding again and again, but being thorough is so important. Preceding to the 800 grit sandpaper moving throughout the car to attain the spots you want. You’ll move all the way up to 1,000 grit sandpaper and lastly 1,200 grit sandpaper. With each upgrade in sandpaper, you will remove that clear coat more and more, being careful not to damage the paint.
To confirm you’re getting somewhere, you can feel across the spots you have been working on. The paint should feel smooth to the touch. Similar to the smooth surface of wood once it has been sanded down properly. This is a good sign that the clear coat is coming off well.
Step 4: More Prep
Once you’re done with the wet sanding it is time to prepare for the dry sanding. Before sanding you’ll have to tape up some spots on the car. Delicate areas such as mirrors, windows, lights need protection. Again this has everything to do with only working with the clear coat, and not damaging paint, or the undercoat.
Step 5: Dry Sanding
Once your car is ready to go it’s time to move onto dry sanding. Once again the car should be completely dry before you start with this step. You’ll want to use 600 grit and/or 800 grit sandpaper for this step. The idea is nice smooth finishes that are even. Most if not all of the clear coat will be gone after this point, so it’s especially time to be delicate on the paint, you don’t want this to go from an “remove clear coat job” to an “I need to paint my car job”. That is why I have touched on it so many times in this article.
While you do this you can take water and rinse the car. You’re looking for the water to turn a sort of creamy color once it happens, stop. This is starting to take the undercoat off at that point so the sanding portion is done. Simply wipe the car down one more time and leave to dry.
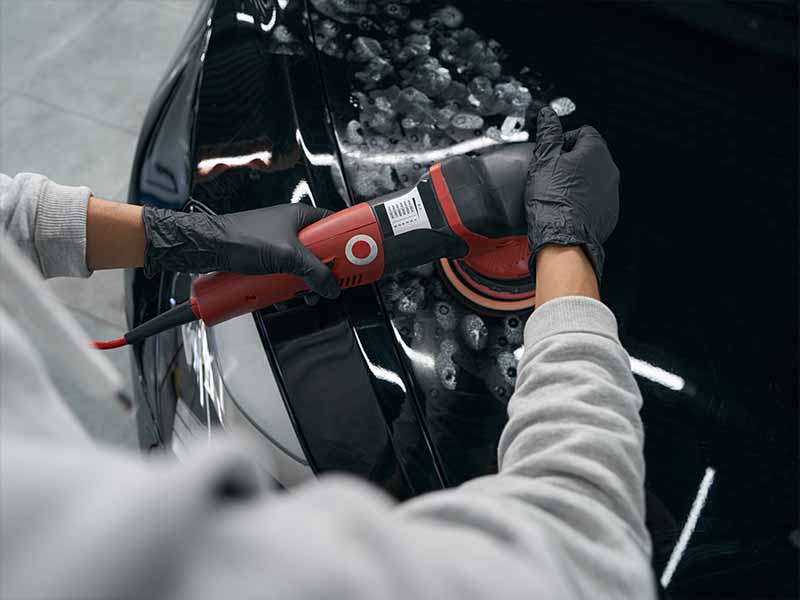
Step 6: Polish
Once at this stage it’s time to polish the sanded portions of the car. You can do this with an automatic polisher or the wool pad either option works.
Going the automatic way is much faster and easier. You would want to set the polisher to the lower speeds and try to apply a nice even coat of polish. Try to make sure that you hit every piece of the surface areas you have been working on. While doing this stick with a circle style motion.
If you’re using a wool pad the process is ideally the same just more manual. Which for some of you more hands-on people may be the route you prefer. Just be sure to put in plenty of elbow grease and get that nice even surface area. Think the Karate Kid wax on, wax off, vibe, and if you haven’t seen the Karate Kid then after you’re done with your car you should go watch it, it’s a great movie.
Anyway once you have all the spots polished you should have removed all the scratches. Now the process simply becomes getting rid of the swirling circles of polished left behind. Switching to lighter pads and either rubbing faster or running your polisher at higher speeds to start buffering them out at a lot faster.
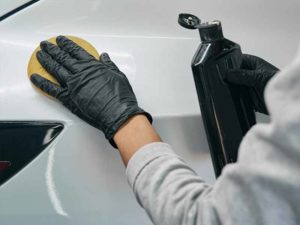
Step 7: Clean Polish
At this point, you want to make sure the polished area is fully cleaned off. Using a good detailing spray cover the polished areas to really bring out that “shine” and brighten the car’s finish. It’ll be a lot like spraying clear coat back on. This will help lock that polish and keep your paint looking great for that much longer.
This is also the stage where you can apply wax if that is your choice. Just simply spread it over the areas you’ve been working with and if you do try not to leave the polisher on anyone spot as this can cause excessive damage to the areas you just fixed.
 1")
Helpful Links
Conclusion
There you have it. A step by step guide to removing your clear coat without causing additional damage to the paint. This may take time to master but once you do you’ll be that much better at maintaining and caring for your car.
Just remember to take your time and refer to this guide whenever you may be stuck or need additional information. As it has been echoed through this entire guide being careful means you save time by only dealing with that clear coat, and not causing damage to the paint, causing even more of a pain.
So grab that those grits, this Remove Clear Coat guide, and take pride in Doing It Yourself! Until then good luck with all your automobile cleaning and touch-ups, and to also see our site for additional helpful guides.