Table of Contents
- How To Use Foam Polishing Pads
- The Three Styles of Foam Pads
- What Is a Polishing Pad?
- Foam Polishing Pads are Different
- How the Pad Is Used
- The Purpose of Polishing
- Step-By-Step Guide to Use a Foam Polishing Pad for Machine Polishing
- Step-By-Step Guide to Use a Foam Polishing Pad for Hand Polishing
- Don’t Forget to Clean Your Foam Polishing Pads
- Helpful Links
- Conclusion
Giving your car a nice polish after a wax is a quick way to make it showroom-ready and achieve a level of shininess you can’t get otherwise. However, polishing isn’t as easy or intuitive as you might think. Using a foam polishing pad for the first time can be a daunting task. In this guide, we’ll teach you how to use it.
We’ll also cover some more specifics about the foam polishing pad you’re using. Near the end of this article, we have step-by-step instructions that will guide you through the whole process, followed by cleaning instructions to keep your pads ready for the next polish.
How To Use Foam Polishing Pads
Attach The Pad
Prime The Pad
Finish The Prime
Apply The Final Drops To The Pad
Section Off Your Car
Start Your Machine
Distribute Across The Section
Start Polishing
Check, Clean, And Replace The Pad
Repeat Until Finished
The Three Styles of Foam Pads
As you’re shopping for a foam pad, you’ll find three different kinds. They look very similar, but they’re used for different applications:
· Compounding. This is the most aggressive foam pad. It’s used to remove surface defects and cut into the topcoat of your car.
· Finishing. The least aggressive pad is the finishing pad. It is used to restore your car’s surface and add a sealant to your topcoat.
· Polishing. With the middle-most level of aggressiveness, polishing pads help mask imperfections and give your car a shine.
 1")
What Is a Polishing Pad?
Polishing pads are used when you want to polish your car. They are used in junction with a polishing compound (liquid product) and typically a machine that spins the pad quickly.
If you just apply the compound on a towel and rub it across your car, you won’t get the right results. As simple as a pad looks, there’s a lot of science going on.
If you look at the pad under a microscope, you’ll notice specifically engineered gaps on the surface of the pad. In theory, these gaps will help distribute the compound while helping the pad cut into the topcoat slightly.
Remember, polishing your car partly includes removing some of the surface defects in the topcoat, which means you need to slightly remove some of the coat.
If you’ve seen someone waxing or polishing their car with a machine, there’s a chance you’ve seen a foam polishing pad in action already.
Foam Polishing Pads are Different
We should also mention that there are other types of polishing pads. We put together an ultimate guide about polishing pads, but the short version is that you can choose between foam, microfiber, and wool pads.
This refers to the material used to create the pad. As you can imagine, all three have a long list of benefits and drawbacks.
How the Pad Is Used
You’ll understand the process more when we get into our step-by-step guides at the bottom of this article. For now, you should understand how these pads are used.
The pad is an intermediate surface between you and your car. It will store polishing product and then distribute it to your car evenly. It will also use the material and texture of the pad to cut into your topcoat and give your car a perfect polish.
The big takeaway here is the pad’s ability to cut into your car’s topcoat. Without this feature, your polishes will always look dull.
If you want to see the difference, there’s an easy test to do. Use a paper towel to rub polishing product on a small section of your car, and use a foam polishing pad with the same product in a section next to that. Wipe them both dry with a microfiber towel and take a look at the difference. It will be very obvious, especially if you’re using a tool to polish.
The Purpose of Polishing
Polishing gets done after waxing your car, and it serves a few purposes. It makes surface defects less noticeable and hides scratches and small dents.
It will also strengthen your paint after acid rain weakens it.
Polishing also gives your car a great shine. This happens by cutting into the topcoat, evening out the protective layer on your car.
It’s more of a cosmetic detailing step. Still, you need to know how to correctly polish your car, or else you’ll be left with streaks and a weird-looking finish.
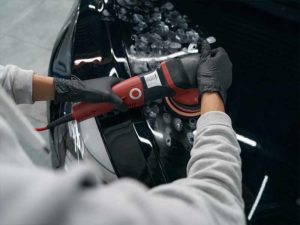
Step-By-Step Guide to Use a Foam Polishing Pad for Machine Polishing
If you are using an orbital or dual action polisher, this is the right section for you.
Step 1: Attach the Pad
Start by attaching the foam polishing pad onto your machine. The make and model of the tool will determine how you fasten the pad.
In most cases, there’s a backing plate that goes behind the polishing pad. It will allow the pad to be screwed into the tool, so it doesn’t fling away when you turn on the machine. Take a look at your polisher’s manual to see exactly how to do this.
Other tools use Velcro to affix the pad to the machine.
Step 2: Prime the Pad
Priming your polishing pad ensures it’s ready to start working. With a foam pad, some experts will wring and squeeze the pad prior to putting it on the machine. There’s a risk to tearing it if you don’t know how to correctly do that.
To keep things simple, we suggest that you avoid doing that and instead use a few small drops of polish on your foam pad. Try to evenly spread them across the pad. The exact amount will depend on how large your pad is, but it’s a good idea to be more conservative if you’re doing this for the first time.
Step 3: Finish the Prime
Now, use your fingers and spread the polish across your pad. You should focus on keeping the layer even across the pad.
In this step, you’ll better understand how much product you’ll need to use. The goal is to completely cover the polishing face of your pad with as little product as possible. Continue to add little drops of product if you don’t have enough.
Step 4: Apply Final Drops to the Pad
Next, apply three drops to the pad. Each drop should be about the size of a dime, and you should use fresh polish (as in, don’t re-use some of the runoff from the previous steps).
In regard to placement, you should put these drops near the edge of your pad. This will be the first section you press against the car, so make sure it’s in a convenient location where you can comfortably hold the machine and use it.
Step 5: Section Off Your Car
Before touching the polisher to your car, you’ll want to pick a section to start with. We suggest starting with a small section if you’re a beginner. This minimizes the damage that can be done and also gives you an opportunity to learn how to use the tool and polishing pad.
A lot of this process comes easier after you practice. With that said, you should take your time.
Moving forward, a 1 foot by 1 foot section will work well. It’s large enough to quickly progress through your car while still small enough to ensure you give your car the attention it needs.
The idea is that you shouldn’t polish outside of this section until the whole section is done. You don’t have to physically section off your car with tape or a tarp — instead, just visualize the area as you’re working. There’s no harm in accidentally going over the same section twice, so don’t worry.
Step 6: Start Your Machine
With the machine turned off, push your pad flat against the surface of your car. Hold the tool there. Turn your machine to its lowest speed setting and give it a moment to get started. Doing this will evenly spread around the product on your tool as well as your car.
If you start your machine prior to putting it on your car, the excess product could spray off your tool and make a mess.
Step 7: Distribute Across the Section
This is where the idea of creating sections first comes in handy. While your machine is still on its lowest speed setting, slowly move it around the predefined section of your car. This will fully distribute the polisher to your vehicle.
Step 8: Start Polishing
With the product distributed, you can turn up your speed. We suggest a medium or medium-high speed setting.
To polish, you should apply 4 to 5 pounds of pressure. Allow the machine to do most of the work for you.
With an orbital polisher, make sure you don’t stay in one area for too long. This can result in your topcoat melting, doing damage to your car.
With a dual-action polisher, you can be more casual. The built-in mechanism will prevent heat buildup and make the job easier.
In either case, slowly move your machine around the car and remember to be consistent.
Step 9: Check, Clean, and Replace the Pad
From time to time, you’ll need to check your foam polishing pad. These pads aren’t built to withstand a full polishing session, and it’s common to swap them out a few times before your car is finished.
To do this, simply turn off your machine while you hold it against your car. When it’s done spinning, flip it around and look at the polishing surface of your pad.
If it looks really dirty, then grab a plush microfiber towel or pad brush. Hold either of these against your pad, start up the tool, and rub against the pad to get rid of the excess dirt. The rotation of the polisher will do most of the cleaning for you.
If the pad is cracked, ripped, or has pieces missing, then you’ll need to swap it out for a new pad. Damaged pads can harm your car, so you shouldn’t take the risk. Simply take off this pad and put on another one.
Step 10: Repeat Until Finished
When you have a clean pad on your polisher, keep repeating steps 4 through 9. This process should repeat until your car is completely polished.
 2")
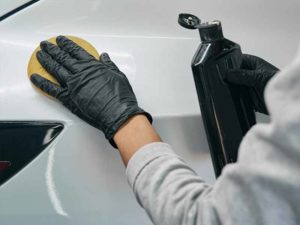
Step-By-Step Guide to Use a Foam Polishing Pad for Hand Polishing
You can also use a foam polishing pad to polish your car by hand. If you don’t have tool that you’re using, follow the steps in this section. The process requires fewer steps but you’ll probably spend longer since you’re not using a tool.
Step 1: Create a Section
Just like with the tool, you’ll want to start by identifying a section of your car. This should be a 1 foot by 1 foot area. Try to only polish within this area until you’re done and ready to go to the next area.
As a reminder, doing this works for a few reasons. By focusing on one area at a time, you will give your car the right attention. It also helps you to polish the whole car without forgetting a spot. Finally, it helps regulate how much polishing product you use.
You don’t need to physically mark this section, just visualize it.
Step 2: Prime the Pad
You’ll also need to prime the pad. This “activates” the pad, optimizing how well it’s going to perform.
To prime the pad, add a few little drops of polishing product around the pad. Evenly space the drops. Use your fingers to spread the product across the entire pad.
The goal is for the pad to be fully saturated with a layer of polisher. Add more product if you need to, but avoid oversaturating it.
Step 3: Add Some More Product
Once the pad is fully primed, add three dime-sized blots of product to the pad. Create a triangle with them with the center of the pad being the center point of the triangle. The placement doesn’t matter a lot, so don’t overthink this step.
Adding this extra product is critical because it will transfer almost immediately to your car, since the pad is already saturated.
Step 4: Wipe Side to Side
Now it’s time to start polishing. Use a side-to-side motion with the pad. You should apply about 10 pounds of pressure since you’re doing it by hand.
It’s important to stay consistent with your motion, pressure, and speed. Changing it along the job can make parts of your car look shinier than others.
With some experience, you can try wiping in small, overlapping circles as you polish. This technique can get tiring pretty fast, and it’s easy for a beginner to accidentally change up the speed and pressure. We wouldn’t suggest trying it until you get some more practice.
You should keep going side-to-side, top-to-bottom in your area until you notice the polisher starting to dry.
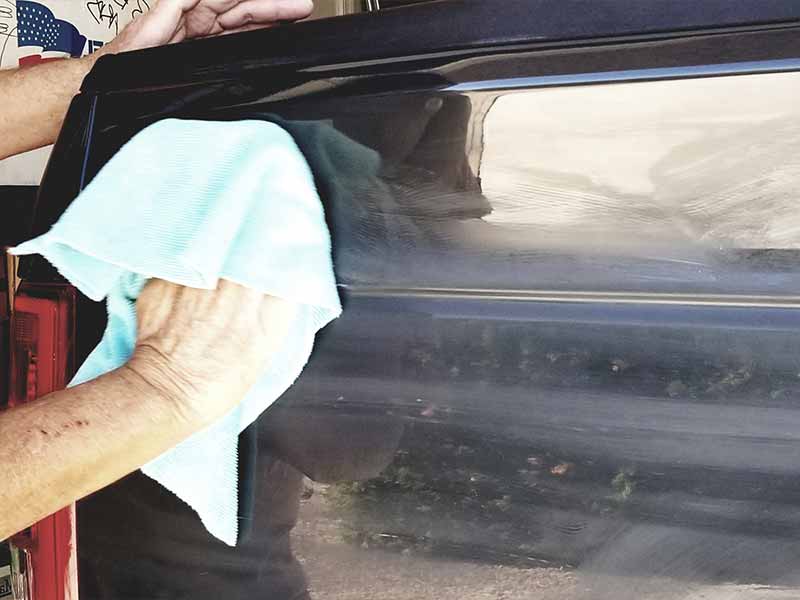
Step 5: Wipe Dry
Don’t let the product dry on its own. This can create an undesirable finish. Instead, grab a plush microfiber towel and completely wipe the area dry. You should wipe each section dry before moving to the next one.
When your drying towel gets dirty or too wet, then swap it for a clean, dry one.
Step 6: Repeat
Keep doing this process for the rest of your car. Repeat steps 3 through 5 until your vehicle is completely polished. Remember to focus on one area at a time in order to get the best results.
This process might take a while, especially if you’re new to polishing. Try to avoid rushing through it. Not only is this a good learning experience for future polishing, but it’s always best to take your time if you want to have the shiniest car in the end.
 3")
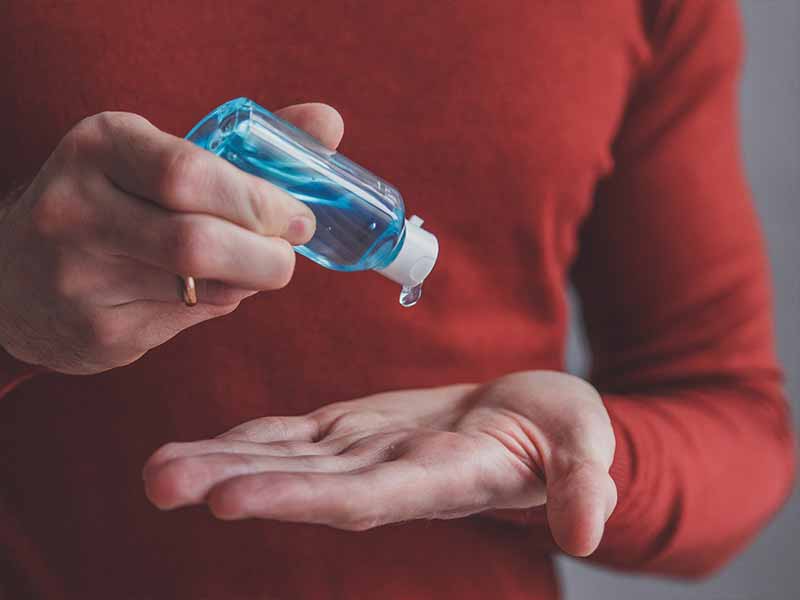
Don’t Forget to Clean Your Foam Polishing Pads
We mentioned that you should clean your pads when you notice they get dirty during the polishing session. Well, you should also clean all the foam polishing pads after the job is done. Storing them with polishing product and dirt in them can ruin the pad over time.
If you don’t know how to properly clean a foam polishing pad, follow our guide here. Even though these pads aren’t very expensive, it would be a waste of money to neglect their cleanliness and throw them out after each use.
A quick way to clean them is to soak your pads in a mixture of citrus dish soap and water or a specialty pad cleaning solution. If your pads are stained, then rub them with mineral spirits before wiping them down with isopropyl alcohol.
It’s always best to clean your pads immediately after using them. When the polishing liquid is still wet, it has the best chance of being removed.
After cleaning them, rinse them with detergent-free water and lay them out to dry.
Helpful Links
Conclusion
Polishing your car might be slightly difficult and time-consuming, but it’s a lot easier if you follow the steps we laid out earlier.
This guide taught you how to use foam polishing pads and how to get the most out of each polish with them.
If you want to learn more about DIY detailing, check out the rest of our site.