Table of Contents
One of the most popular steps for a typical detailer entails polishing a car. This is one of the best ways to get rid of scratches and swirls across your car, but it’s a little intricate.
To better describe this process, our experts put together this step-by-step guide all about how to use a polishing compound. Follow along and give it a try on your own car.
By the end of this, your car should be swirl-free and as shiny as the first day you brought it home.
How To Use Polishing Compound
Step 1: Assess the SituationStep 2: Pick the Right Pad and Compound
Step 3: Fully Wash Your Car
Step 4: Wipe it Dry
Step 5: Do a Small Spot Test
Step 6: Prep the Pad
Step 7: Work the Area
Step 8: Wipe Off the Excess
Step 9: Check Your Pad Repeatedly
Step 10: Repeat, Going from Coarse to Fine
Step 11: Give Your Car a Nice Wax
What Is Polishing Compound?
A polishing compound works in junction with a buffer and pad. This compound has a certain level of abrasion and lubricity.
When you use it on your car, you’ll be cutting away a thin layer of your topcoat. The goal? To get rid of minor scratches, swirls, and imperfections across your car.
Whenever you use a dual-action polisher with a polishing pad, you need to use a polishing compound. This is the liquid that goes on your pad that then gets applied to your vehicle.
In reality, you can ruin your polishing results if you choose a different compound, so this selection is critical.
In the scheme of cutting power, a polishing compound is on the more aggressive side. The only product family that is more aggressive is a compounding solution. This means that you can expect a healthy amount of cutting when you use a polisher with polishing compound.
 1")
Step-By-Step Guide to Use Polishing Compound
Without further ado, here’s our ultimate guide for using a polishing compound. If you follow these 11 steps in order, you’ll get the best possible results.
Step 1: Assess the Situation
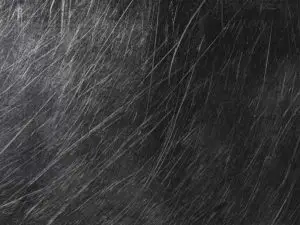
Before diving in, you should take some time to really assess what’s going on. Polishing is a way to remove slight scratches and swirls from your car.
During this time, you’ll want to pinpoint all the scratched areas of your car. More importantly, you should closely examine the areas to see if a polisher will even help.
If you can see metal or white in the scratch, it’s too deep to remove. The only areas that you can repair are ones in which the scratch doesn’t fully go through the topcoat. By seeing either of these two colors, it signifies that the scratch went fully through your topcoat as well as your car’s paint.
If you only see the color of your car’s paint, then you can probably get rid of the swirls (which is great news).
You might also want to take some time to mark the different areas so you remember to hit them all. We suggest using something like blue painter’s tape near the scratch you want to remove.
You’ll apply this tape after step 4 but make a mental note of these areas for now. Don’t push the tape down too hard and remember to remove it immediately before or after polishing so it doesn’t hurt your topcoat.
Step 2: Pick the Right Pad and Compound
Your findings in step 1 will do a few things. For one, it will determine what kinds of pads and compounds you’ll need to use. For deeper and more abundant scratches, you’ll need to use pads and compounds that cut deeper.
Most professional detailers will grab an orbital polisher with a wool pad for serious cutting power. For beginners, it might help to use a dual-action polisher to avoid overworking an area and melting the topcoat.
For very thin scratches, you can get away with using a finer polishing pad. For deeper cuts, you’ll probably need to use a series of pads. The first one you use will be the most coarse, meaning that it cuts the deepest and most sloppy. The last pad you use will be the finest, meaning you get the best polish and correction.
In most cases, a liquid product will be the best option since it applies well and does a good job. Make sure the level of abrasion in the product matches the level of cutting you want to do in this project.
Step 3: Fully Wash Your Car
You shouldn’t turn on your polisher yet. Instead, you need to spend some time getting your car prepared. In this step, you’ll need to fully wash your car.
Even if you’re just polishing a few small sections, we suggest giving your car a full wash. This will come in handy for step 10, but it also doesn’t hurt to spend a few extra minutes since you have the products out, anyway.
For reference, you should be using an automotive soap combined with water in a bucket along with some nice microfiber towels.
If you washed your car last week, it’s very important that you don’t skip this step. The dirt that piles up after just a week can be dangerous enough to destroy your topcoat during the polishing process. A small piece of debris that you can’t even see can be used to essentially key your car while you polish away a scratch.
In simpler terms, make sure you wash your car again before grabbing your polisher. A few minutes of cleaning upfront can save hours of paint correction down the line.
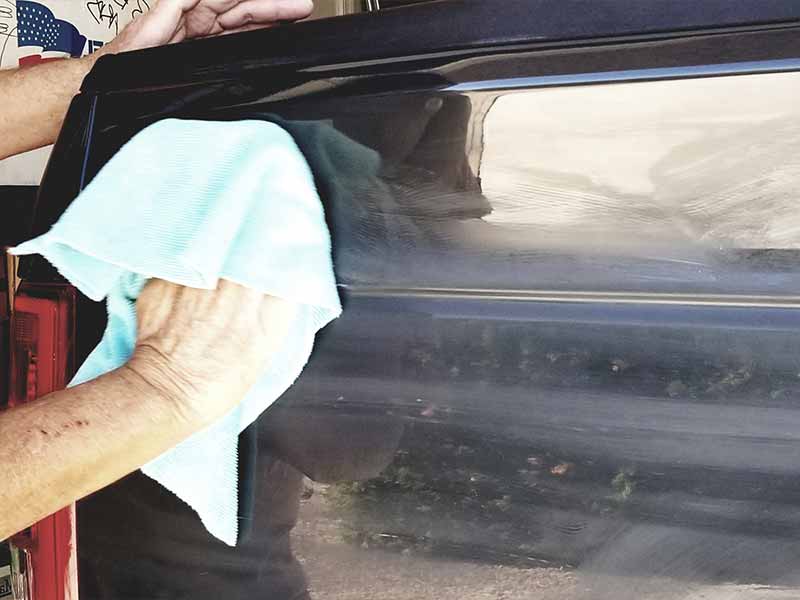
Step 4: Wipe it Dry
After your car is completely washed, you should dry it. It’s always best to hand dry your car for a few reasons. First off, it prevents water spots and streaks. In addition, it ensures no water gets in the way during the polishing process.
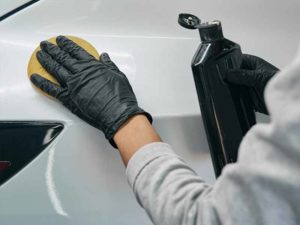
Step 5: Do a Small Spot Test
Before you start polishing your car, you need to test the different components you’re using. This is especially useful for beginners and people using products for the first time.
Think of this like a practice run before you attempt to remove swirls. Pick a small area of your car — preferably one that’s slightly hidden. We suggest trying this on the lower area of your rear quarter panel.
This test is a way to see how the product works on your car before committing to polishing a huge section. It also gives you more familiarity with how the product applies, comes out of the bottle, and dries.
It’s best to use a handheld sponge or applicator. Put the polishing compound on the sponge. Use your hand and rotate in small circles to apply the compound to your car via the sponge.
Before the compound dries, you’ll need to wipe it off with a dry, clean microfiber towel. Take a close look at the area. If everything looks okay, then you’re ready to jump to the full polishing project.
Step 6: Prep the Pad
The four pieces of this puzzle are your polishing compound, polishing pad, polishing machine, and your car’s topcoat. In order to get the best results, you need to make sure that your polishing pad is ready for the job.
A key factor in polishing a car has to do with saturation. You never want to apply dry product to your topcoat. You also want to avoid applying too little compound. In either of these cases, you can actually scratch your car further or you’ll be stopped from removing the swirls altogether.
To prepare your pad, grab the pad and compound with the polisher turned off. Apply three, pea-sized squirts of product to the pad. Wipe it on with a gloved finger and ensure the pad is equally saturated across the surface.
Then, apply one more pea-sized drop to the center of the pad and leave it there.
You may also optionally add a small drop of polishing compound to the area that you’re about to polish.
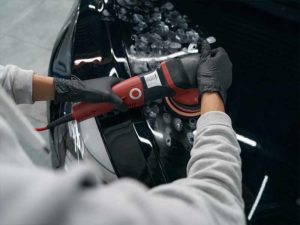
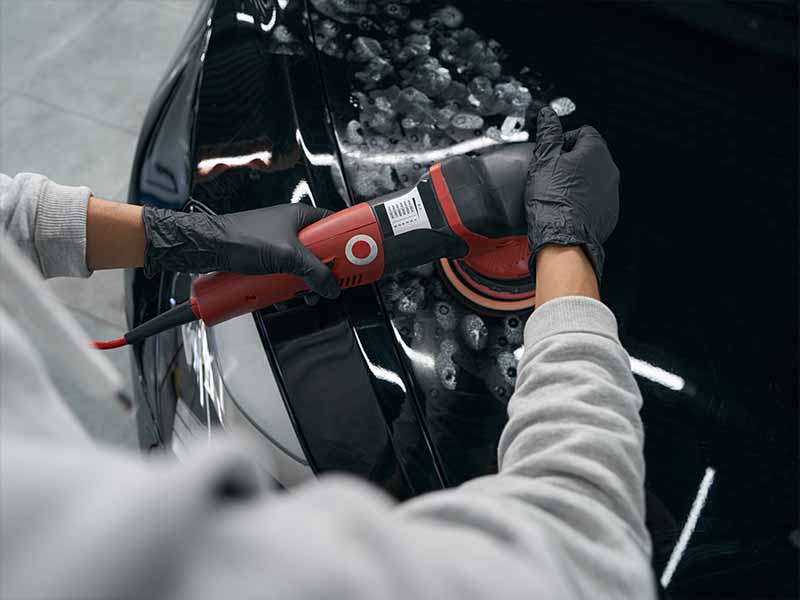
Step 7: Work the Area
Turn your polisher onto a fast speed setting. Somewhere between 4,000 and 5,000 oscillations per minute (OPM) is perfect for polishing your car.
You’ll want to move your machine in a cross-hatch pattern across this area. That entails moving the tool vertically across the area, then horizontally (or vice versa). There’s no need to move the tool in little circles since the orbiting part of your polisher does that automatically.
As far as pressure is concerned, you should focus more on consistency and less on how much you apply. In general, 5 pounds of pressure is plenty. Since you’re using a tool, you should be letting the polisher do all the work. You can get away with using very little pressure, as long as you’re consistent.
Remember to only focus on the area with swirls and the small area around it. You won’t want to remove excessive topcoat across your car in un-scratched areas.
Step 8: Wipe Off the Excess
After cross-hatching the area, turn off your tool. Place it pad-side up on the ground and grab a clean microfiber towel. Use this towel to wipe off the excess product in the area.
When polishing compound dries on its own, it will be hazy on your car. By wiping it, you’re avoiding this issue and keeping your car shinier.
Step 9: Check Your Pad Repeatedly
As you polish your car, your pad will need to be replaced. It will either become too dirty, filled with grime, or start to rip up.
If you notice any of these symptoms, you should turn off your polisher and immediately swap out your pad. If it’s just too dirty, then you can quickly clean it off with compressed air or a secondary towel. This should get rid of the excess grime and let you get back to work. Remember to reapply product before you continue.
Additionally, you want to make sure that your pad is always saturated. If the pad becomes too dry, you’ll start to create swirls on your car as you keep polishing.
This means that you need to touch your pad to make sure it’s still wet before you continue polishing.
Step 10: Repeat, Going from Coarse to Fine
Now, you’ll want to repeat steps 6 through 9 if you have other areas you need to polish. If the scratch is pretty deep, you’ll want to work your way from a coarse pad to a fine pad in the same area.
That entails repeating the process but changing out the pad for progressively finer ones. The finer pads will cut less and will correct the coarsely cut area of your car. By stepping through this progression, you’re making the area smoother and shinier.
Step 11: Give Your Car a Nice Wax
After polishing, we always suggest giving your car a nice wax. At this point, you’ve already done all of the pre-work required to wax your car. This pre work would take more time if you choose to wax your car at a later time.
Instead, go through the waxing process now (if you’d like). Since waxing adds a great shine to your car, your vehicle will look even more impressive. After this step, you’ll have a scratch-free car that shines as if you just bought the vehicle.
How Polishing Works
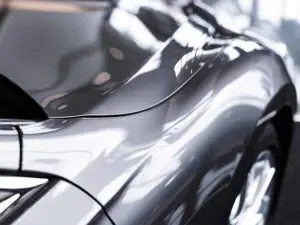
The act of “polishing” is different than cleaning or waxing your car. Polishing happens after both of these events take place, and the sole purpose is to add a level of shininess to your car. Rather than adding a coat of protection, polishing will slightly remove a layer from your car’s topcoat.
Shininess happens when there’s a uniform layer of your topcoat. As you drive, little defects, scratches, and contamination will make your car look duller. Even after washing and waxing, these defects will hurt the overall presentation of your car.
This is when a detailer might choose to polish their car.
The polishing pad and solution will work together to uniformly scrape away the top layer of surface defects. This will reveal a smooth layer of topcoat which makes the car look much shinier.
As such, polishers are more abrasive than waxing agents or typical car washing soaps.
In addition to making your car look shinier, polishing is also a proven way to get rid of small “swirls” or scratches on your topcoat of paint. Again, this is achieved by removing a thin layer of your topcoat.
Helpful Links
Conclusion
Just like that, the light scratches and swirls on your car have disappeared. We hope that our 11-step guide has helped you clean up your car and remove surface-level defects.
gIf you want to learn more about DIY detailing, be sure to explore the rest of our site at Detail DIY.