Table of Contents
- Long Throw Vs Short Throw Polisher
- What Is the Difference Between Long Throw and Short Throw Polishers?
- Long Throw Polisher Pros and Cons
- Short Throw Polisher Pros and Cons
- What’s the Best Long Throw Polisher?
- Which Short Throw Polisher Should I Buy?
- Rotary, Orbital and Dual Action Polishers
- Forced Rotation Polisher Vs Dual Action
- How to Buff a Car Without Burning the Paint
- What Does Burnt Clear Coat Look Like?
- Helpful Links
- Conclusion
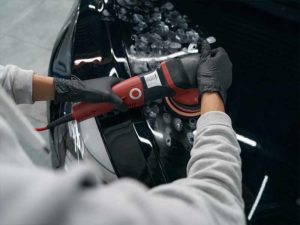
Dual action polishers are amazing tools in a detailers arsenal. But there are a lot of variations of them out there with different pros and cons.
One of the variations that you may have seen mentioned in forums or when reading product descriptions is long throw or short throw.
In this article we’ll explain the difference between these two types of polishers and give you all the information you need to know to understand which one is right for you.
Long Throw Vs Short Throw Polisher
Long throw polishers cover more area and make polishing an entire vehicle faster than a short throw polisher.
Long or short throw refers to the amount of deviation in the orbit of the polisher.
Short throw polishers typically have an orbit around 8mm while long throw polishers will have an orbit of 15mm or greater.
 1")
What Is the Difference Between Long Throw and Short Throw Polishers?
One trait that defines a dual action polisher is the “throw” or the amount of motion the backing plate and pad exhibit as both swing out from the center of the polisher. The larger the throw, the more area the pad is capable of covering.
As the name suggests, long throw polishers have a larger orbit pattern than their short throw counterparts. Most long throw polishers also use microfiber pads ranging from 15mm to 21mm in size, whereas short throw polishers typically use pads that are 8mm to 12mm in size.
A less common difference between long throw and short throw polishers is their physical size. Some short throw polishers are slightly smaller than their long throw counterparts, although that typically varies by brand.
 2")
Dual action polishers spin and orbit as shown above. The distance the orbit moves from side to side is the throw. Short throw polishers typically have approximately an 8mm orbit. Long throw polishers typically have a 15mm or greater orbit.
Long Throw Polisher Pros and Cons
Thanks to its larger orbit and larger pads, a long throw polisher covers more surface area than its short throw counterparts. The ability to polish a larger area in one go makes long throw polishers a valuable tool for quickly finishing larger vehicles.
The larger offset and more powerful whipping motion lets long throw polishers transmit more power to the pad, giving you greater levels of correction with less effort in a shorter amount of time. While long throw polishers remain a step down from rotary polishers in terms of cutting power, they’re still quite capable of eliminating scratches and blemishes in a short amount of time.
Unfortunately, the longer throw also transmits more vibration to users’ hands, which could induce fatigue for some users. Also, you’ll lose the ability to polisher tight spaces due to the larger pad and orbit pattern.
Short Throw Polisher Pros and Cons
Although there’s not much difference in size between short throw and long throw polishers, most people find the former more comfortable to work with. The shorter throw is less jarring to many users, which also cuts down on user fatigue.
The smaller pad sizes also offer another benefit – the ability to polish in tighter spaces. This comes in handy if you have hard-to-reach exterior panels that can benefit from polishing.
While short throw polishers offer better control and greater ease of handling, the trade-off comes in the form of a smaller work area. Your typical 8mm short throw polishers simply don’t cover the same amount of area in one pass that a larger 15mm long throw polisher would. It’s only a negative if you need to finish a detailing job quickly and want to get the most out of your polisher.
What’s the Best Long Throw Polisher?
Long throw polishers are typically only used by pros or hobbyists with a lot of experience. If you fall into this category it makes sense to spend the cash on a quality machine.
RUPES Big Foot
With so many choices available on the open market, it’s hard to choose the best long throw polisher that meets your detailing needs. Some of the features to look for in a long throw polisher include:
- Durable construction
- Ergonomic comfort
- Versatile speed control
- Numerous accessories
If you want the best of the best, RUPES is usually the company to purchase a polisher from. Experienced detailers will tell you that you can’t go wrong with any RUPES. They aren’t cheap though so be prepared to pony up some serious cash for one of these fine Italian long throw machines.
Which Short Throw Polisher Should I Buy?
Short throw polishers are great machines for professionals as well as beginners. You can spend a lot on a short throw polisher from a company like RUPES or you can find the sweet spot and get the best bang for the buck.
Our suggestion for a short throw polisher is both inexpensive and premium quality.
Griot’s Garage G9
Griot’s Garage also makes the G9 Random Orbital Polisher, a good option if you’re looking for a versatile yet powerful polisher with an 9mm throw. The short throw combined with the polisher’s compact design and potent 1000 watt motor makes it powerful enough to handle any buffing job.
The price is very nice for this premium product. It is extremely well balanced and doesn’t hop, skip, and jutter like some cheaper and less balanced machines.
It has a hook and loop backing plate and accepts standard 6 inch polishing pads. It also has the standard Griots detachable power cable which makes storage easier.
Rotary, Orbital and Dual Action Polishers
When you shop around online or in stores, you’ll find rotary, fixed orbital and dual action polishers. We’ll go over the differences between each machine and what they have to offer when it comes to auto detailing.
Rotary Polishers
Take one look at a rotary polisher and it’s easy to see how much it resembles an angle grinder. That’s because rotary polishers are based on angle grinder designs. Some companies even sell adapters to transform ordinary angle grinders into rotary polishers because of how similar both function in terms of overall operation.
Rotary polishers are incredibly powerful tools for performing comprehensive paint correction, as these machines often deliver impressive cutting power for their size. However, this same advantage also gives rotary polisher users a much smaller margin of error. Simply put, it’s easier for users to burn through clear coat with a rotary polisher, as opposed to an orbital or dual action polisher.
Keep in mind that on a rotary polisher, the outer diameter of the pad spins faster than the inside diameter. You’ll want to adjust your polishing to account for this aspect if you want to avoid damaging the clear coat.
 6")
Orbital Polishers
Next up is the fixed orbital polisher. These machines tend to resemble orbital sanders, but they operate quite differently. The head of a fixed orbital polisher doesn’t rotate the way that a rotary polisher does. Instead, the head plate moves in small, circular motions that more closely resemble a hand polish.
Fixed orbital polishers tend to operate at low speeds with a low amount of torque. Unfortunately, that puts most orbital polishers at a disadvantage when it comes to removing deep scratches and large blemishes. However, that also makes these machines perfect for applying wax and sealant.
Keep in mind that dual action polishers are also orbital polishers, although their unique traits set them apart from your average fixed orbital polisher, as you’ll see below.
 7")
Dual Action Polishers
The great thing about a dual action polisher is that it emulates the way you would hand-polish a car, but with a lot less elbow grease involved. Unlike a rotary polisher, the head plate on a dual action polisher is offset so that it oscillates as it rotates. This creates an elliptical orbit pattern that, like an orbital polisher, mimics the motions of a typical hand polish. Most dual action polishers are also designed with novices in mind. Not only do they usually weigh less than their forced rotation counterparts, but they’re also more compact and simpler to use. The random orbit pattern on most dual action polishers means that the pad doesn’t follow the same path during each rotation. This makes it less likely for users to burn through their clear coat. Forced Rotation Polisher Vs Dual Action
The main difference between forced rotation and dual action polishers is how they respond when you apply pressure on the pad. Push down on a dual action polisher and it will slow to a stop as the machine lacks the torque to overcome the pressure. This makes DA polishers safer to use since there’s not enough pressure to burn through the paint.
Forced rotation polishers, on the other hand, will keep spinning no matter how much downward force you exert on the pad. This gives forced rotation polishers better cutting power for intensive paint correction tasks, but it also makes using one riskier for beginners. You’ll definitely need to pay attention when using a forced rotation polisher.
It’s not unusual for professional detailers to use a forced rotation polisher for major paint correction tasks and follow up with a DA polisher to take away swirls and other imperfections left behind by the former.
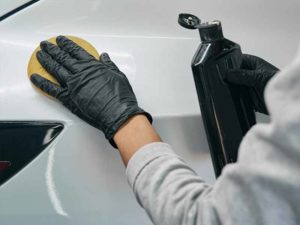
How to Buff a Car Without Burning the Paint
So, you’re finally ready to buff like the pros. The last thing you want, however, is to accidentally burn through the clear coat and paint. It’s an all-too-common mistake among first-timers and novice detailers. Even experienced pros aren’t immune to potentially gnarly mistakes when it comes to polishing.
Keep in mind that it’s pretty hard to burn the paint with a dual action polisher unless you’re dealing with incredibly thin paint. Nevertheless, you’ll want to follow these tips to ensure a burn-free experience when it comes time for buffing.
- Pick a good polisher. Carefully do your research and pick one you feel most comfortable with. You may even want to practice on another vehicle or at least a body panel you don’t mind sacrificing. Also, keep the task at hand in mind. Some jobs may require a polisher that covers more area or works faster to correct scratches and swirls.
- Make sure you have good lighting before you get started. You’ll want to see every bit of the paint, including scratches and swirl marks. On lighter colored cars, the extra light comes in handy for checking if the polish has broken down.
- Stay out of the sun. Although you’ll want good lighting, polishing in direct sunlight can do more harm than good. Use shade or pick an overcast day when polishing.
- Thoroughly wash and clay bar your car before you start polishing. The whole purpose of clay bar detailing prior to polishing is to remove any contaminants from the surface. This prevents contaminants from being worked into the polisher pad, which could go on to create nasty swirl marks while buffing.
- Pick an out-of-the-way test area to buff, first. This gives you a chance to see if the polishing compound is too aggressive or not aggressive enough for the task.
- Never linger in one spot for too long. The key to always keep moving the polisher while keeping it parallel to the surface. Focusing on one spot for too long runs the risk of burning the clear coat.
- Always apply an even amount of pressure, but don’t use too much pressure. The latter can also cause you to burn through the clear coat and paint surfaces.
- Be careful when polishing uneven surfaces. Too much pressure on one area can result in burn-through.
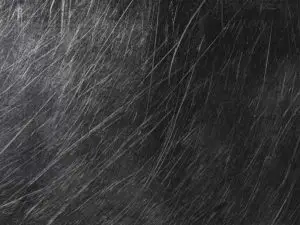
What Does Burnt Clear Coat Look Like?
Identifying burnt clear coat is crucial in more ways than one. Not only does it help you know if you’ve made a mistake while polishing, but you can even spot and avoid overworked areas before doing anything that could potentially make those areas worse.
In most cases, burnt clear coat will appear lighter than the surrounding paint. Depending on how bad the damage is, you might not be able to spot the damage right away unless you have good lighting. If you can see a faint halo in the paint surface or an area that looks suspiciously lighter than the rest of the paint, then chances are you’re looking at burnt clear coat.
The whole idea of “burning through” clear coat or paint comes from a time when rotary polishers were the most common type of polisher used by detailers. If you weren’t careful, these polishers could generate enough heat to literally cook the surface while leaving behind some unsightly burn marks. And yes, we’re talking about actual burn marks, here.
Even if you didn’t burn through the paint to the bare metal, you’re still left with nasty damage that’s only fixable with a respray. It’s why many detailers take great pains to avoid clear coat burn-through, whether it involves using a less aggressive polisher or employing gentler polishing techniques and compounds.
Helpful Links
Conclusion
The differences between a long throw and short throw polisher may seem a bit superficial, but they make a tremendous difference when it comes to detailing. While both seem similar to each other, they also offer their own unique advantages and drawbacks.
If you’re new to detailing, then you may want to start off with a good quality short throw polisher and work on the finer points of scratch and swirl removal. Once you’ve gotten your techniques down and feel more comfortable with using DA polishers, you can step up to a machine with a larger throw and more power.
Overall, long throw and short throw DA polishers are an incredible time-saver for detailing work. Which one you ultimately choose is up to you – that depends on what you want out of your polisher and the type of work you plan to do with it.