Table of Contents
The de facto standard method of paint correction is the 3-step process. This process is sometimes referred to as “compound, polish, wax”.
In this article we’ll break down these 3 steps in detail as well as explain the tools and products involved with the process so you’ll understand all of the ins-and-outs of how to perform this process on your car or truck for yourself.
Let’s dive in.
3-Step Paint Correction Process
The tried-and-true method of paint correction involves 3 steps that are referred to as compounding, polishing, and waxing. This process is designed to remove paint defects such as light scratches, paint surface stains, oxidation, water spots, and more.
Compounding involves using a abrasive rubbing compound to remove fine scratches and other paint defects in a vehicle’s paint. It is then followed by a polishing compound to restore the shine to the clear coat. Last, a finishing wax is applied to protect the surface from future damage.
Paint Correction Kit
Listed below are the tools required to perform the paint correction process properly with detailed explanations:
Compound
Rubbing compound is an abrasive liquid that is applied to an applicator pad and used to wear away a thin layer from the top of your clear coat.
Automotive manufacturers apply clear coat much thicker than the paint layers beneath as a sacrificial layer of protection that can be polished down some when necessary to remove surface scratches and restore a smooth surface to the paint job.
Compound will remove microscopic layers from the surface of the clear coat but it doesn’t leave the paint surface glossy smooth. The end result is a bit hazy and needs polishing to restore the luster and shine back to the car’s paint.
 1")
Polish
Polish, like rubbing compound, is an abrasive liquid that is applied to a pad to wear away a bit of the clear coat. The difference here is that polish isn’t designed to remove scratches, stubborn stains, remove other paint imperfections. Polish is simply for restoring the gloss and shine to the dull finish that compounding leaves behind.
Polish is like a finer grit sandpaper when compared to the more abrasive compound. Compounding will leave behind a dull light haze on the painted surface. Polish will simply leave a more smooth surface when finished that will look glossy and shiny to the naked eye.
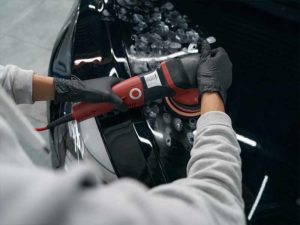
Polishing Machine
Yes, you can you do paint correction by hand, but it isn’t recommended. This is especially true if you need to correct the entire vehicle. Even a small area is difficult to correct by hand.
Most people want to avoid machine polishing out of fear of damaging their paint job. The truth is that a quality dual action polishing machine will not only make the work of removing microscopic layers from the entire painted surface easier, it will do a better job and remove imperfections more evenly.
DA polishers are also extremely safe and beginner-friendly. The motorized spinning head will stop spinning if too much pressure is applied and the dual-action helps distribute the polishing around the surface of the vehicle to avoid heat buildup that a simple rotary polishing machine could cause and lead to burning through the clear coat.
Cutting Pad
A cutting pad is a foam pad that is firmer to allow it to better bite into the vehicle’s paint. This allows it to more quickly remove the light scratches and other imperfections in the clear coat.
Polishing Pad
A polishing pad is much the same as a cutting pad, just a little softer. This makes it a little less aggressive and better at restoring the surface of your vehicle’s paint to a proper shine.
Finishing Pad
Finishing pads are extremely soft and have no bite to them. They are only for applying a protective wax or paint sealant to the surface of your car’s paint.
How To Prep a Car for Paint Correction
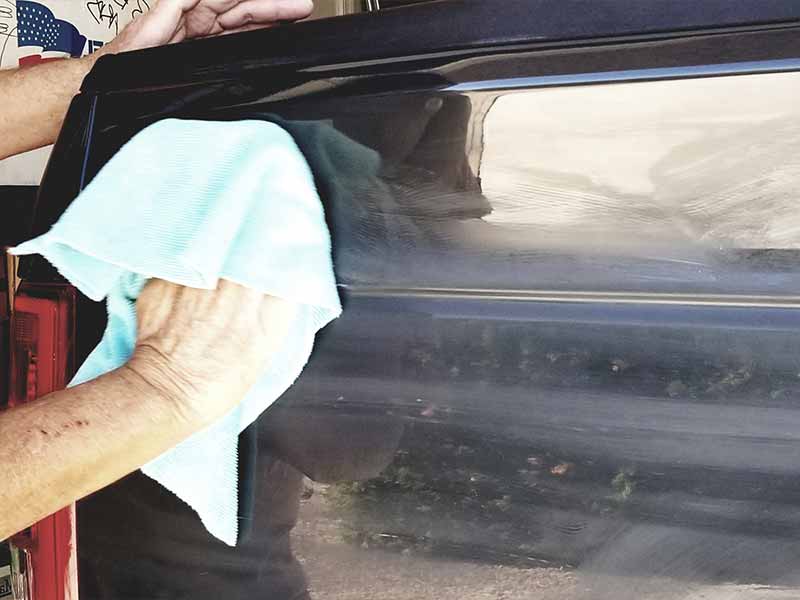
You’ll obviously want to wash your car or truck thoroughly to remove as much loose dirt and other contaminants as possible before beginning the correction process.
The 2 bucket car wash method is the best way to wash a car thoroughly and protect the finish from additional defects.
Once your vehicle’s paint has been well washed, you should check the surface to see if it needs to be decontaminated. Tree sap, bird droppings, bug guts, brake dust, and other harsh elements can bond with the surface of your car’s paint and not be able to be removed with a basic car wash.
If your vehicle’s paint feels slightly rough to the touch you may want to consider using a clay bar to decontaminate the finish before beginning the paint correction process. If contaminants are left on the surface of your finish, they could get lodged in your pad and create additional scratches.
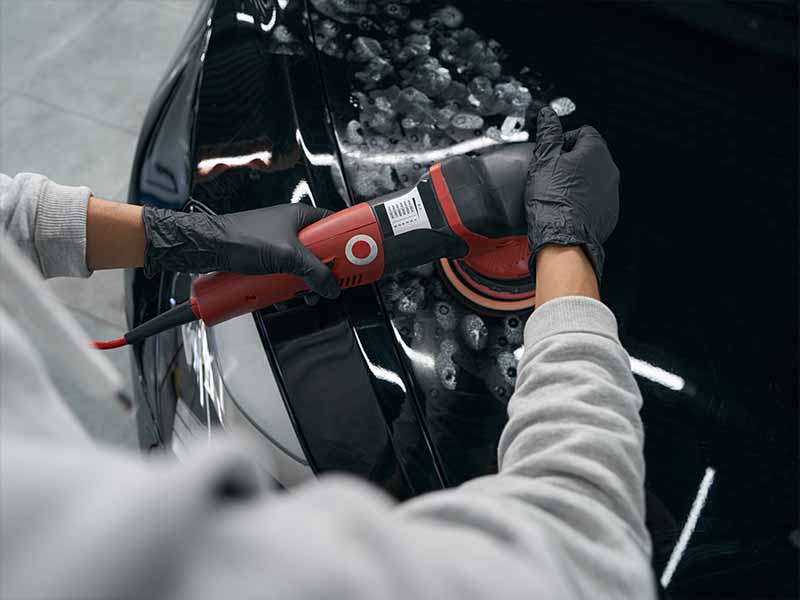
Step 1 - Compound
A small amount of rubbing compound is applied to a cutting pad and used with a dual action polisher to remove microscopic layers from the surface of your car’s paint job. By doing so, fine scratches and other imperfections are removed from the surface of the clear coat.
You will want to work in 2 foot x 2 foot sections to make the job more manageable. With 4 or 5 spots of compound applied to your cutting pad, dab the pad around the area you’ll be working on to spread the compound evenly around the working area and help it work into the pad itself.
Allowing the polishing machine to do the work, move the polisher with light pressure back and forth horizontally across the section you’re working on. Overlap a good amount as you do so to ensure you don’t miss any spots. Repeat this process again by moving the polisher vertically across the area.
You need to keep your pad clean as you work to prevent the pores in the foam of the pad from clogging.
Step 2 - Polish
The polishing process is identical to the compounding process described above. The only differences are that you’ll be using a polishing pad on your polisher and be applying polish to the pad as opposed to compound.
The polish will restore the shine that the compounding process dulled when removing the swirl marks and surface scratches from the car’s paint.
Step 3 - Wax
The 3rd step is commonly referred to as wax but there are several products that can be used for this final step. Let’s go over each of them.
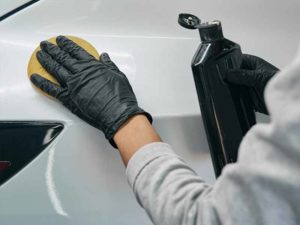
Wax
True natural carnauba wax is rarely used these days. While it looks great when applied to your vehicle’s paint, it doesn’t last very long. It typically only lasts a month at best.
It can be applied by hand or with your dual action polisher in the same way that compounding and polishing were done.
Paint Sealant
Paint sealant is a far more popular method of paint protection these days. These synthetic paint protection products last much longer than a natural carnauba wax. My favorite, Wolfgang’s Deep Gloss Paint Sealant lasts over a year.
This products usually come in a liquid form and are easiest to apply with a dual action polisher.
Ceramic Coating
Ceramic coatings are essentially very advanced paint sealants. They require a little more involved of an application process but they can last for many years.
Another great benefit of ceramic coatings are their ability to help prevent light scratches in your car’s paint. This is a huge advancement for the automotive detailing community.
You won’t be able to use a polisher to apply them. Some are easier to apply than others. You’ll want to do your homework here if this is something you’re considering.
Paint Protection Film
Paint protection film is an incredible protective product that is essentially a giant clear sticker that gets applied to your car or truck. It’s not very DIY-friendly but can be done. There are PPF kits that are applied only to the front bumper, leading edge of your hood, and rear view mirror caps. Other people wrap their entire vehicle in the stuff.
The material itself isn’t all that expensive but the labor involved with applying it is quite involved and costs quite a lot.
Paint Correction Before and After
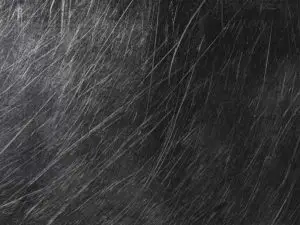
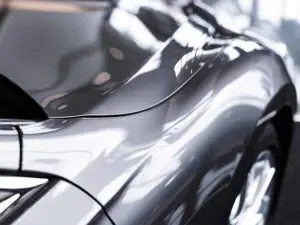
Paint correction can make a huge difference in the look of your car’s paint. Scratches build up on the surface over time and create a dull and spiderweb like look that is especially unattractive on darker colored cars in direct sunlight.
The end result is a near showroom quality finish when all of those scratches have been removed.
 10")
Frequently Asked Questions
How often should you do paint correction?
Paint correction isn’t something that you want to do often. It should only be done when necessary. Since it is the process of removing a thin layer from the top of your car’s paint, it can only be done so many times before there will be no more clear coat to remove.
How many times can you paint correct a car?
There is no set number of times that you can paint correct in general. It varies from vehicle to vehicle. A reasonably safe number of times you can consider performing paint correction is 4 or 5 times. Beyond that and you will want to determine how thick your clear coat is and see how much is left for you to work with.
How long does a paint correction last?
The results of paint correction will last varying amounts of time depending on how well you protect your finish from future damage. Paint protection film or a ceramic coating will certainly help dramatically extend the results of a paint correction and are worth considering.
If you opt not to add any scratch protection to your finish, you should be sure you are washing your vehicle with safe methods and doing everything you can to limit the amount of contaminants that come into contact with your painted surface.
Is paint correction worth it?
Ultimately this is something you’ll need to decide for yourself, but it is dramatically affected by the amount of damage that your finish has sustained.
If you have a lot of imperfections in your paint job and you’re considering getting paint protection film or a ceramic coating, I personally would say that it is very much worth it if you can afford to have it done or are willing to do it yourself.
You can learn more in our article discussing the details of paint correction.
Does paint correction remove clear coat?
Yes, it removes a thin layer from the top of your clear coat. Automotive manufacturer’s apply thick clear coat layers as a sacrificial layer of protection for the paint job. They expect this layer to be polished occasionally to remove paint defects.
Unfortunately, you can only polish a car so many times before there isn’t enough clear coat left to polish away before risking wearing all the way through it and exposing the base coat.
Helpful Links
Conclusion
The 3 basic steps of paint correction are meant as a guide. You may need to perform a couple of compounding passes to ensure that you’ve removed the deeper scratches. Others may find that some light polishing is all that’s needed to remove some minor imperfections.
No matter your situation, hopefully you’ve found this article helpful and informative.
Thanks for visiting and happy detailing.